Vacuum Bag Fermented Hot Sauce
Right on the heals of finishing the Green Chili Sauce ft. Barley Koji*, it’s finally time to start the big batch of hot sauce I make each year with all of the available peppers in my garden! And this year, I’m trying something new: a vacuum bag lactofermentation.
I’ve made hot sauce a number of different ways, using both brine and mash methods, though only the brine method for “large” batches like this. I’ve had mixed success with small chili mashes (by which I mean, the chilies are blended into a paste before fermenting), since any mold growth that could potentially occur isn’t separated by a layer of brine. On the other hand, every time I do chilies in a brine, I can’t help but feel that I lose some of the flavor and heat to the leftover brine at the end.
Enter the vacuum bag! While this is not quite a mash, I should be able to get the best of both worlds: no excess brine, and no contact with oxygen. Another benefit is that I don’t need a specific amount in order to properly fill a certain size mason jar to have an appropriate area of headspace. The only downside is that I’ll have to monitor the carbon dioxide buildup so that the bag doesn’t burst.

I’ve been occasionally harvesting chilies from my plants as they ripen—I get about 300g each time, give or take 50g. Since I usually do a brine ferment in a large mason jar, I have a habit of storing these harvests in the freezer until I have enough to fill it. I’ve only just decided today to try the vacuum bag method instead. Next year, if this goes well, I plan to start the fermentation with whatever small batch I get in July, and add each successive harvest as they come. As it stands now, I should be getting more chilies well into September, so I’ll probably add more to this anyways.
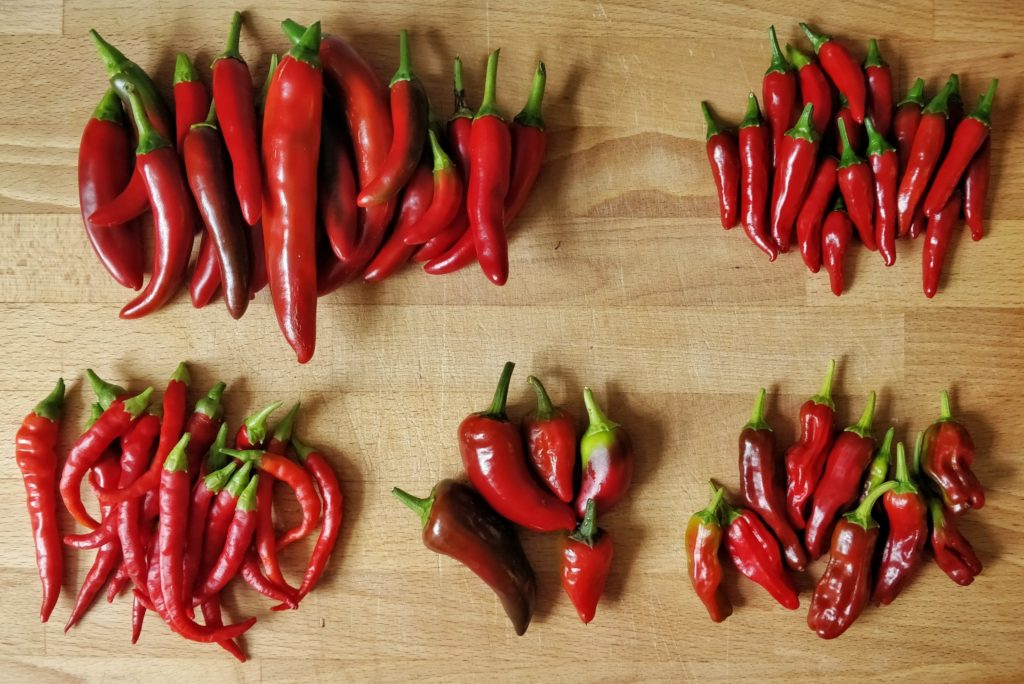
Lets start with an inventory of the chilies I’m using! It isn’t strictly necessary to weigh out each individual variety of chili in my case, since I’m not interested in creating a “recipe”, but since I’m here to log things accurately I shall do just that.
- 394g Korean gochu
- 138g Cayenne
- 100g Fresno/Jalapeño
- 78g Tien Tsin (heaven-facing)
- 49g Shishito
I removed the green stem bits and roughly chopped them all.
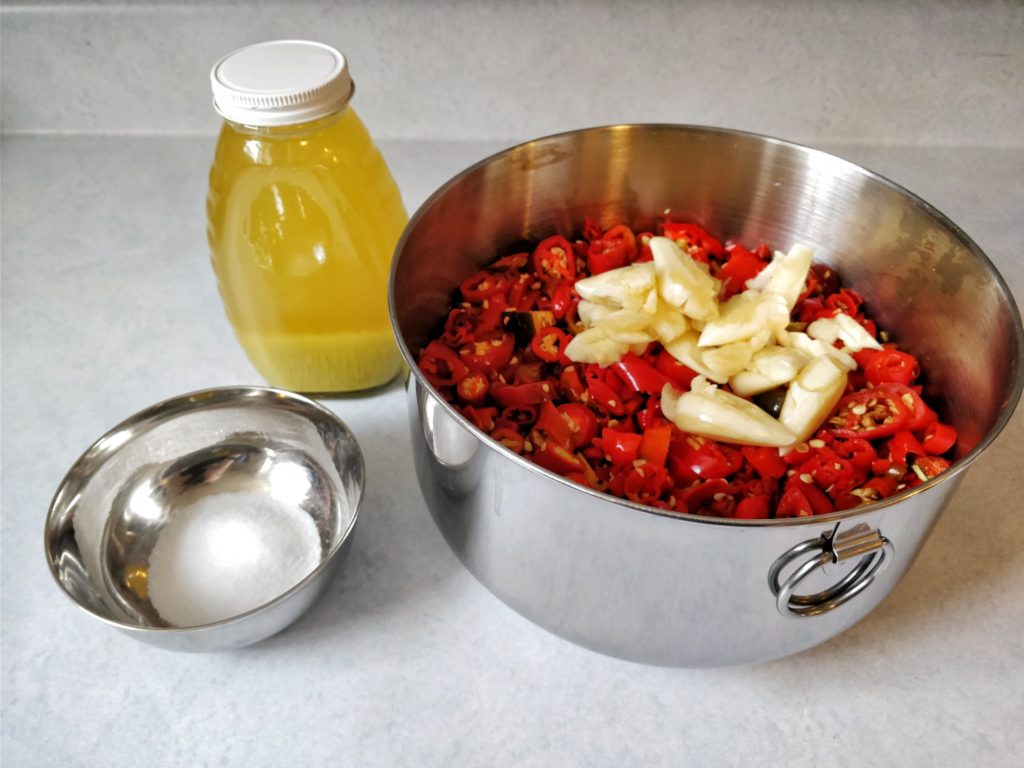
I’ve also included one whole head of fresh garlic, just out of the ground last week. I’ve just peeled and smashed the cloves.
- 63g garlic
This totals to 789g chilies, plus the garlic makes 852g total (that’s about 8% garlic by weight, at least for now). To that I’m adding 3% salt by weight.
- 25.5g salt
I also added 2 teaspoons of brine from the green hot sauce linked above to kickstart fermentation. This isn’t strictly necessary but I do it more often than not.
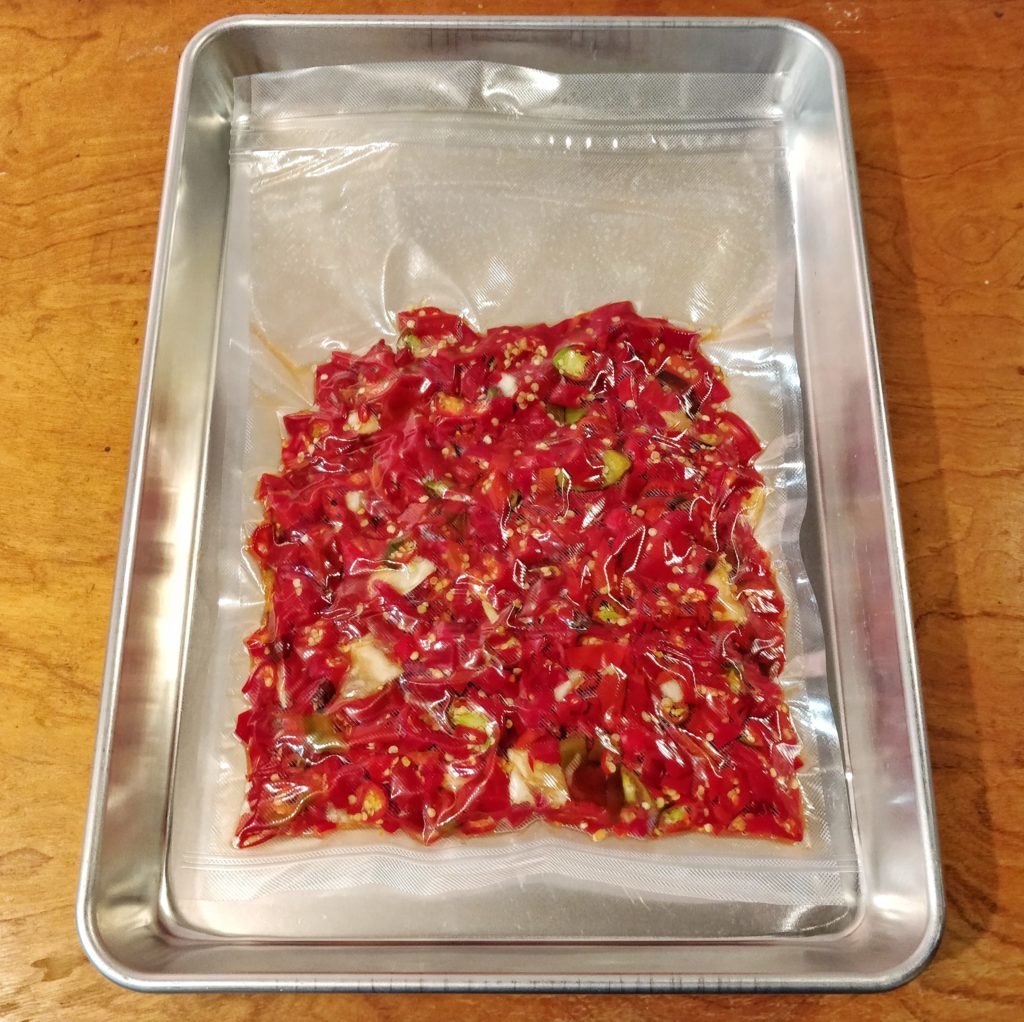
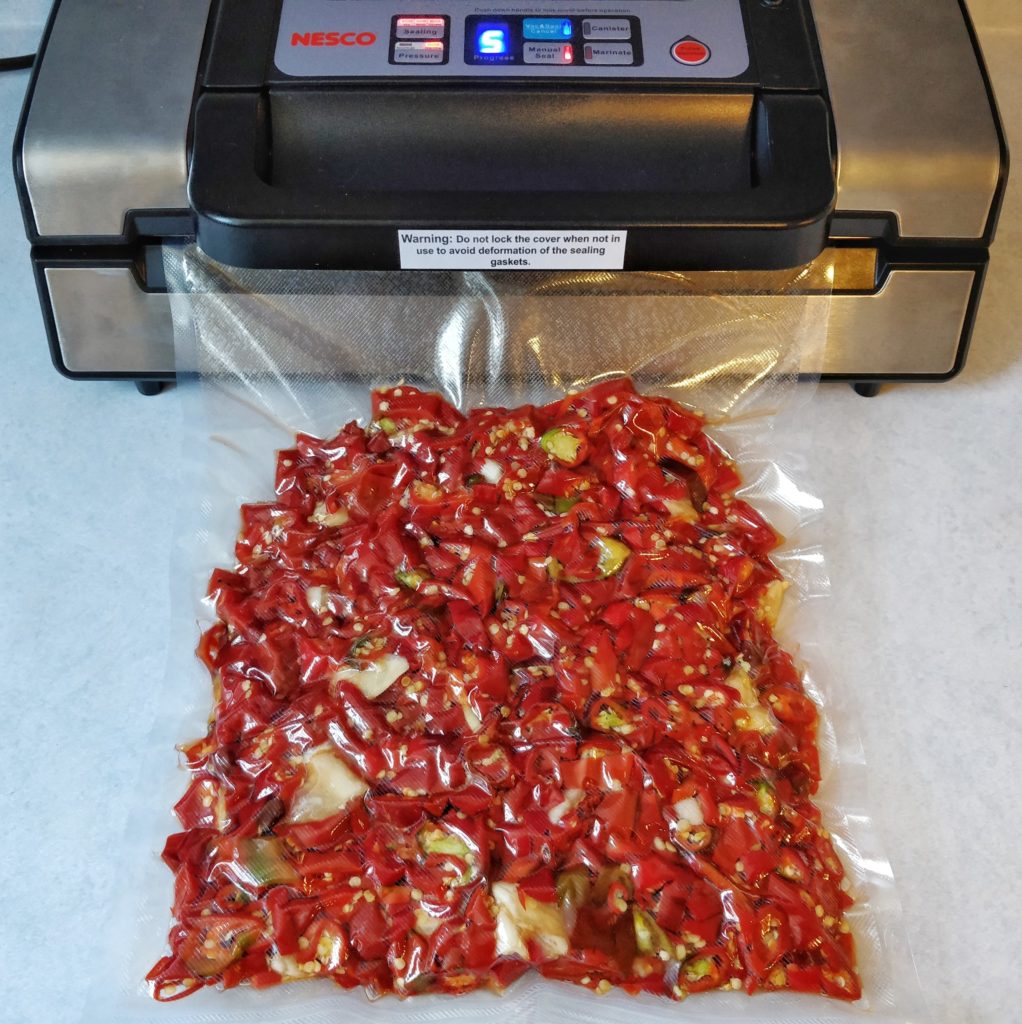
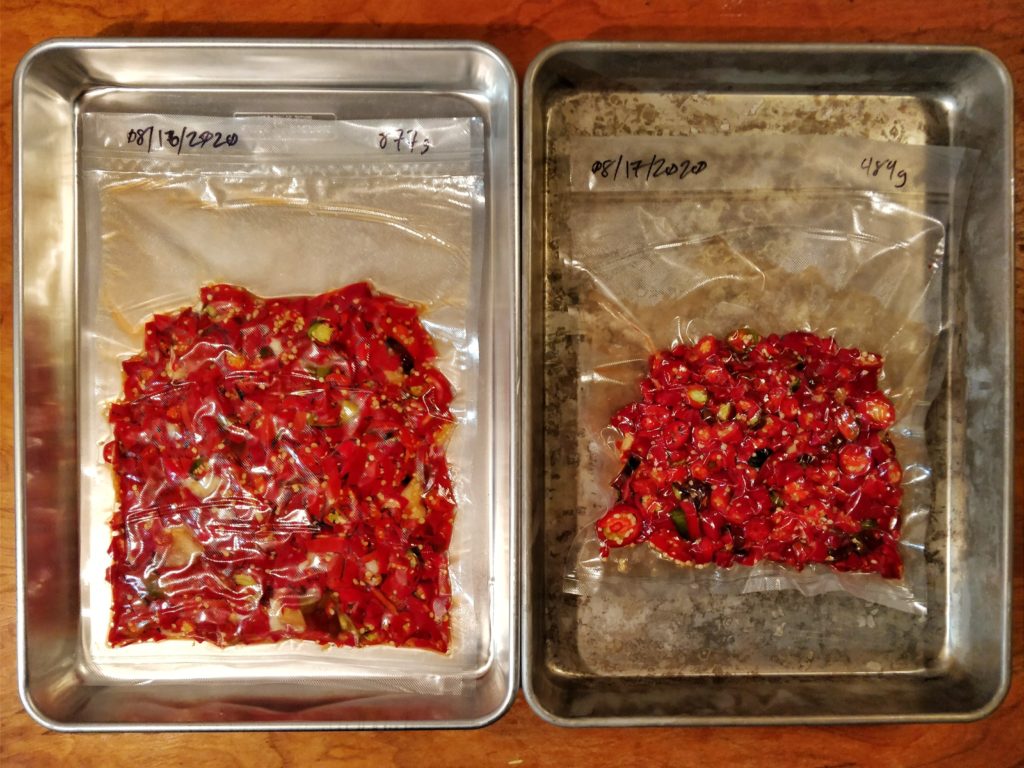
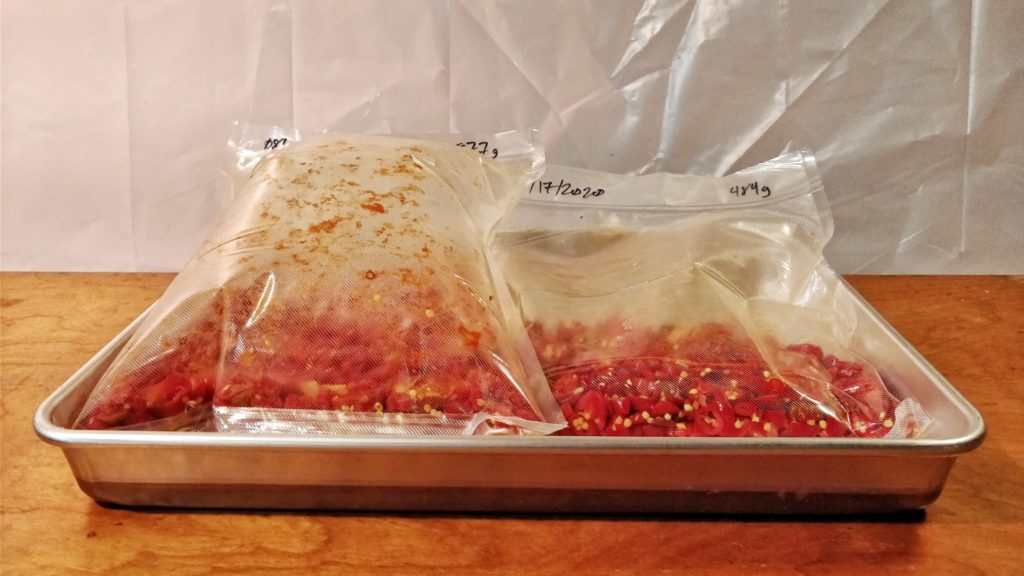
After mixing the salt and starter brine with the chilies and garlic, I prepared my vacuum bag. I unrolled and cut an amount I assumed would be large enough to allow for expansion, and double-sealed the bottom edge. After filling and sealing the bag, I wish I had made it a little longer, but I’ll monitor it in the coming weeks.
I used the “gentle” setting on my vacuum seal machine since adding salt has started to draw moisture out of the chilies, and the thawed-from-frozen ones are already soft. I also double-sealed the top in two separate places, since I wasn’t confident about the first seal as some of the liquid had escaped.
I’ve set the bag in a large aluminum tray in the basement. I’ll probably write an update in a few days, and we’ll see how long it takes to fully expand.
Day 2—8/17
Oops.
I forgot about a bag of chilies I had picked recently in the fridge, weighing more than half of what I already prepared. I’ll prep these the same way and put them in a separate bag.
- 168g Korean
- 57g Cayenne
- 10g Tien Tsin
- 196g Fresno/jalapeño
- 29g Shishito
- 10g Garlic
- 14g salt
- 1 tsp starter brine
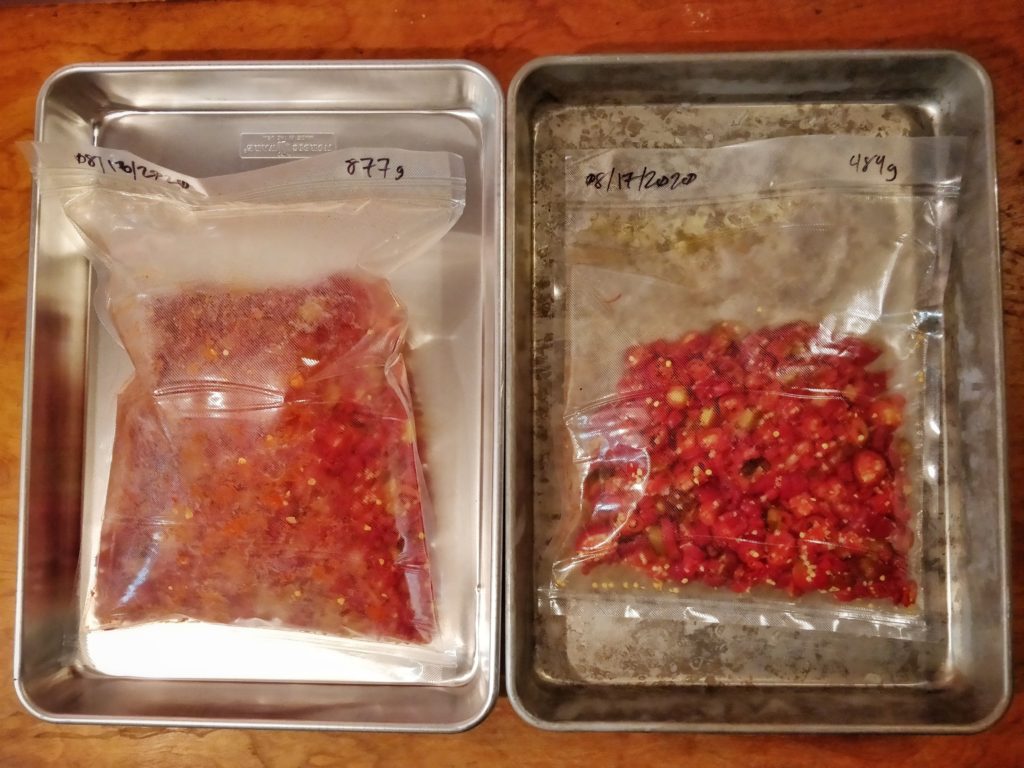
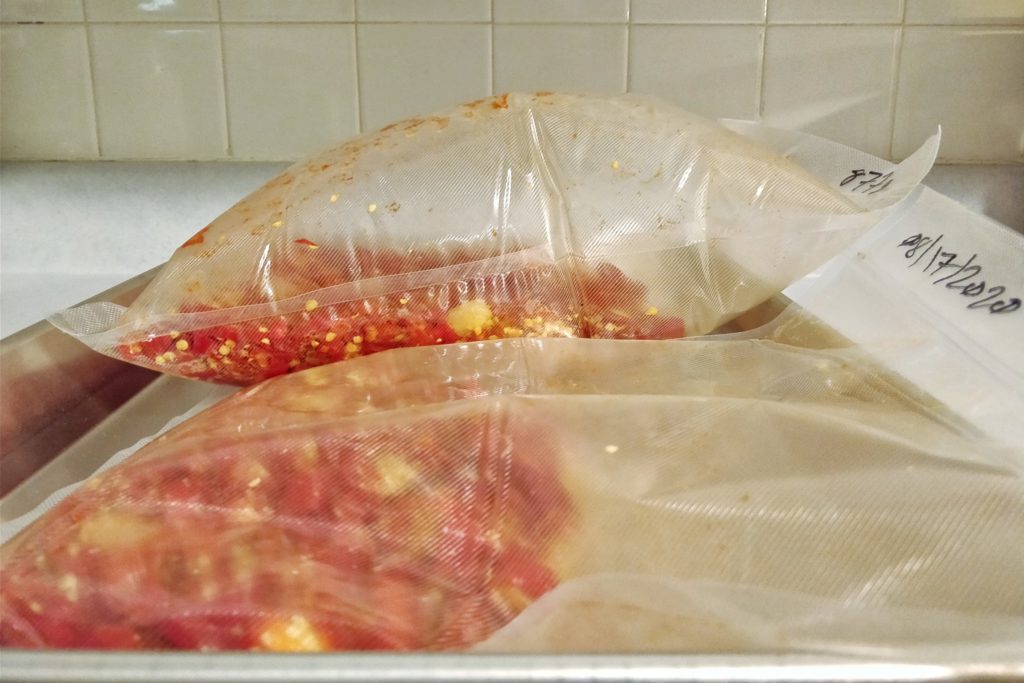
Day 7—8/23
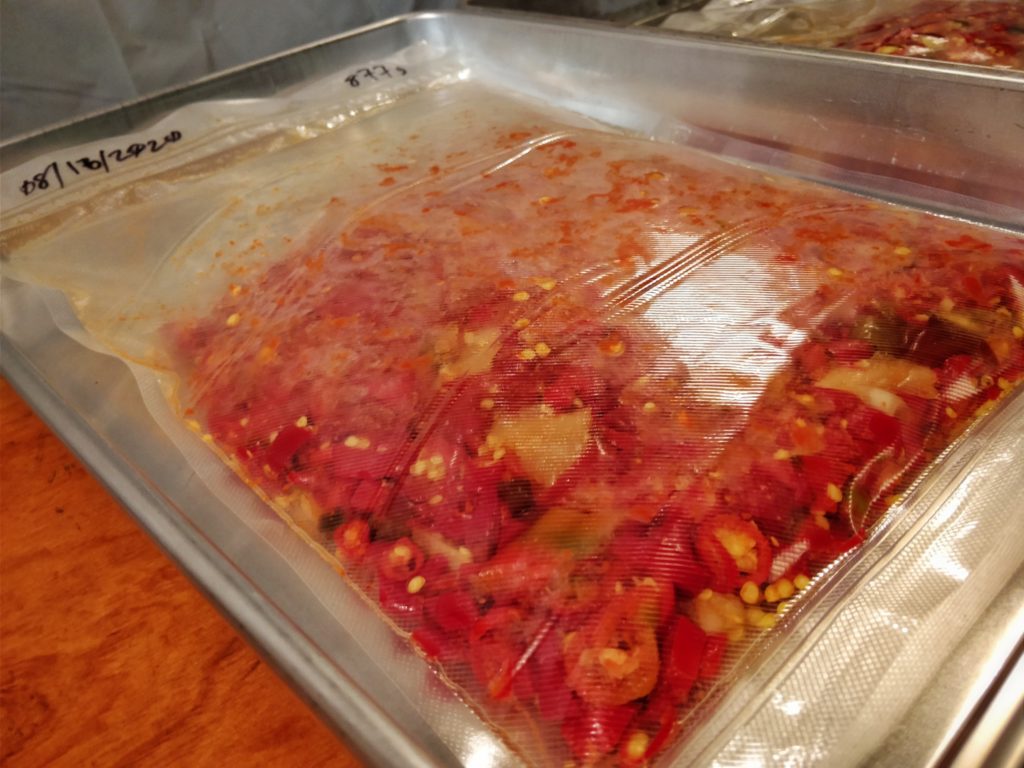
One week later, the first bag has a noticeable amount of “air” (CO2) inside. The second bag is not far behind but is not as dramatic. Even though I’ve been doing lactoferments for a while, it’s still a bit magical to me that you start with seemingly inert materials, mix them together, and in just a few days there is seemingly more inside than you put in. It almost seems like breaking a physical law of the universe, specifically the first law of thermodynamics, but I know that this is just working towards equilibrium.
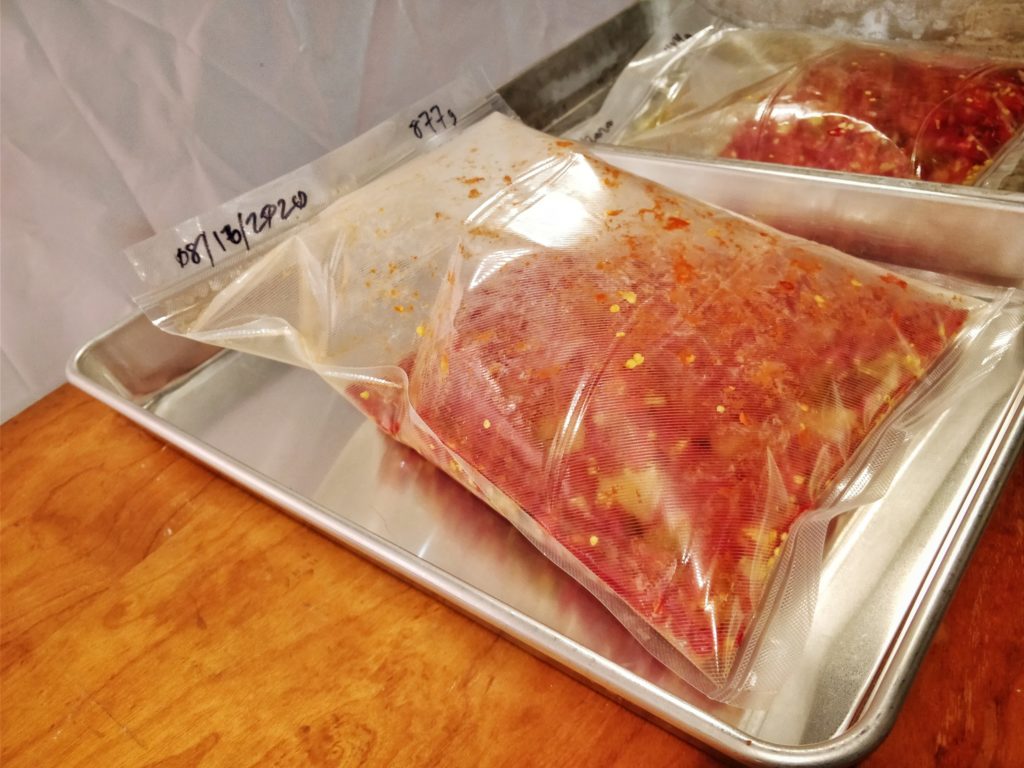
Day 14—8/30
Bags continue to inflate with CO2. I wonder if I’ll be able to let the first bag go for another week without having to deflate it?
Day 21—9/6
The bag has held up another week, with just a bit of give remaining. I might just barely be able to let it go a full month before needing to deflate.
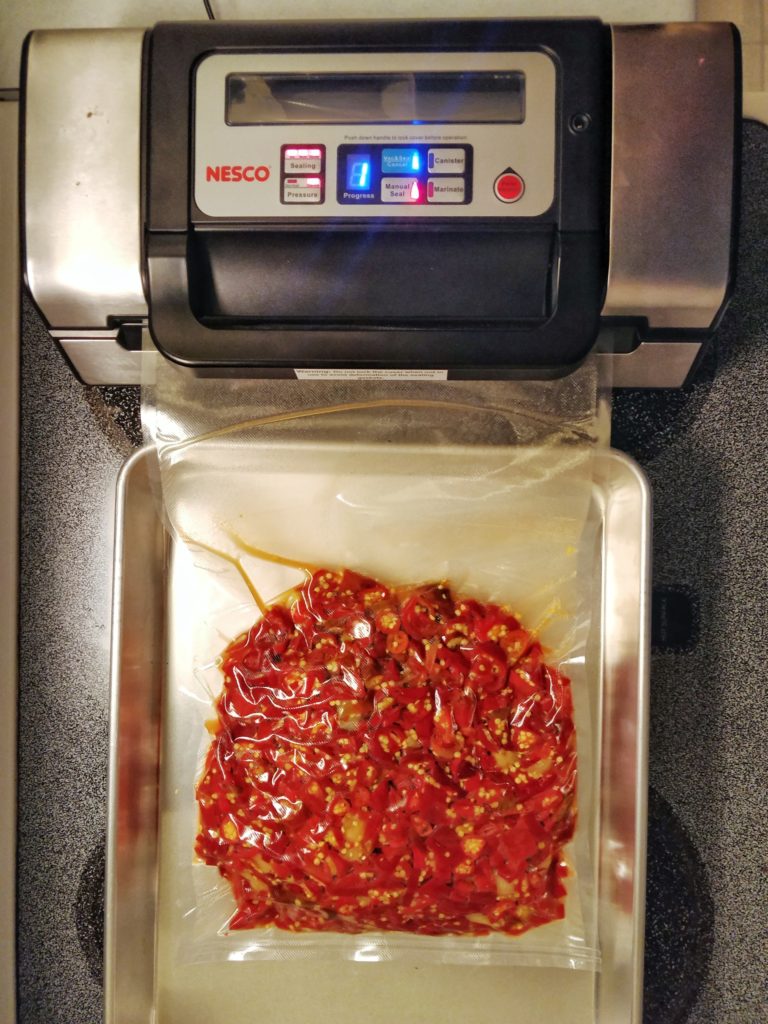
Day 29—9/14
Not quite one month later, and this bag is just about ready to pop! I decided to combine the two bags into one much larger bag to finish the ferment, which I’m expecting to let continue for another month or two.
Did I mention that you should under no circumstances cut a hole in the bag and position your face inches away while squeezing? What are you talking about, “common sense”? Well, it did smell fantastic—lots of garlic and funk, with plenty of chili aroma backing it up. But I may have also accidentally squeezed some chili vapor into my wife’s eye… 😬 Sorry…!
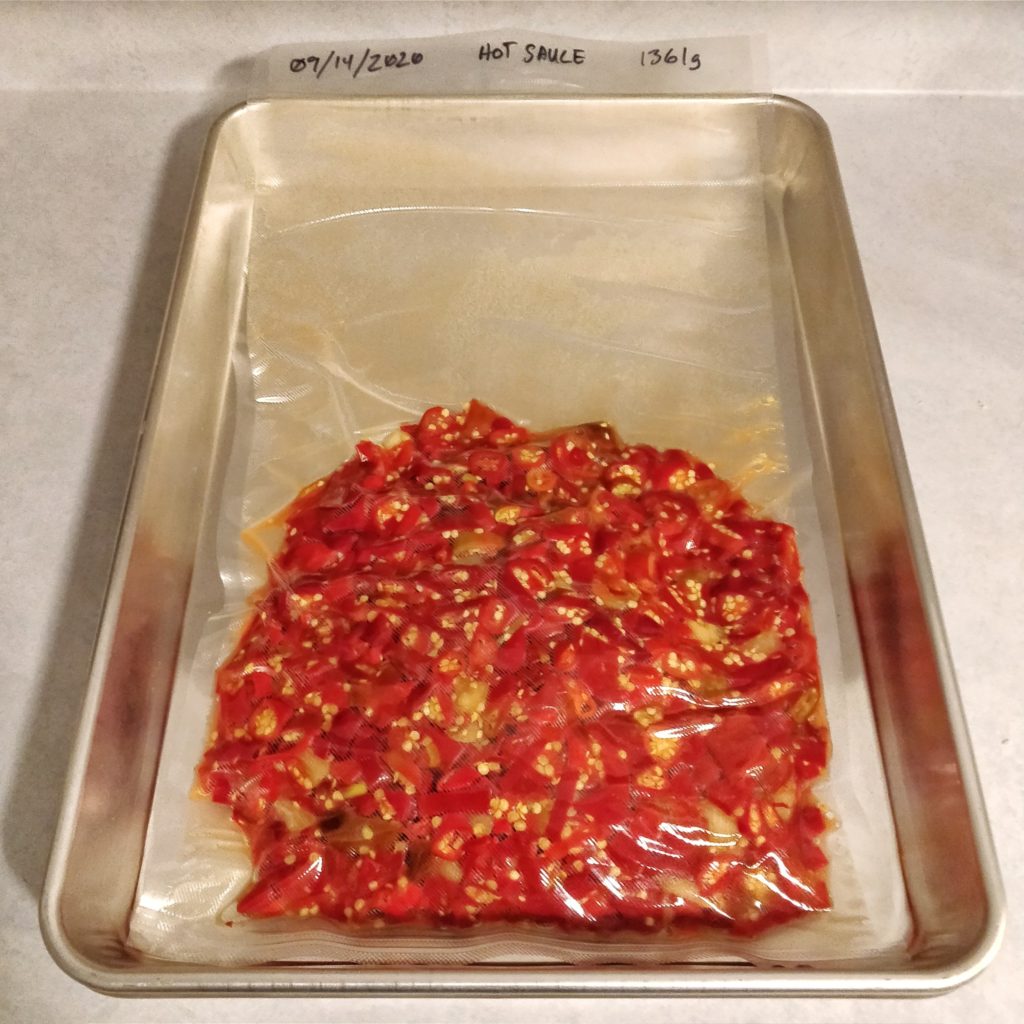
Day 126–12/20
I’m going to have to reconsider my habit of writing the current date onto ferment labels, because I accidentally left this one a month longer than I had intended since I wrote “9/14” on the bag when I resealed it about a month in! No matter though, that’s the beauty of a properly sealed ferment—I could have left it for a year and it might have been even better!
After deflating and resealing the bag, no additional inflation occurred. There were perhaps more tiny air bubbles, but nothing as dramatic as the initial fermentation.
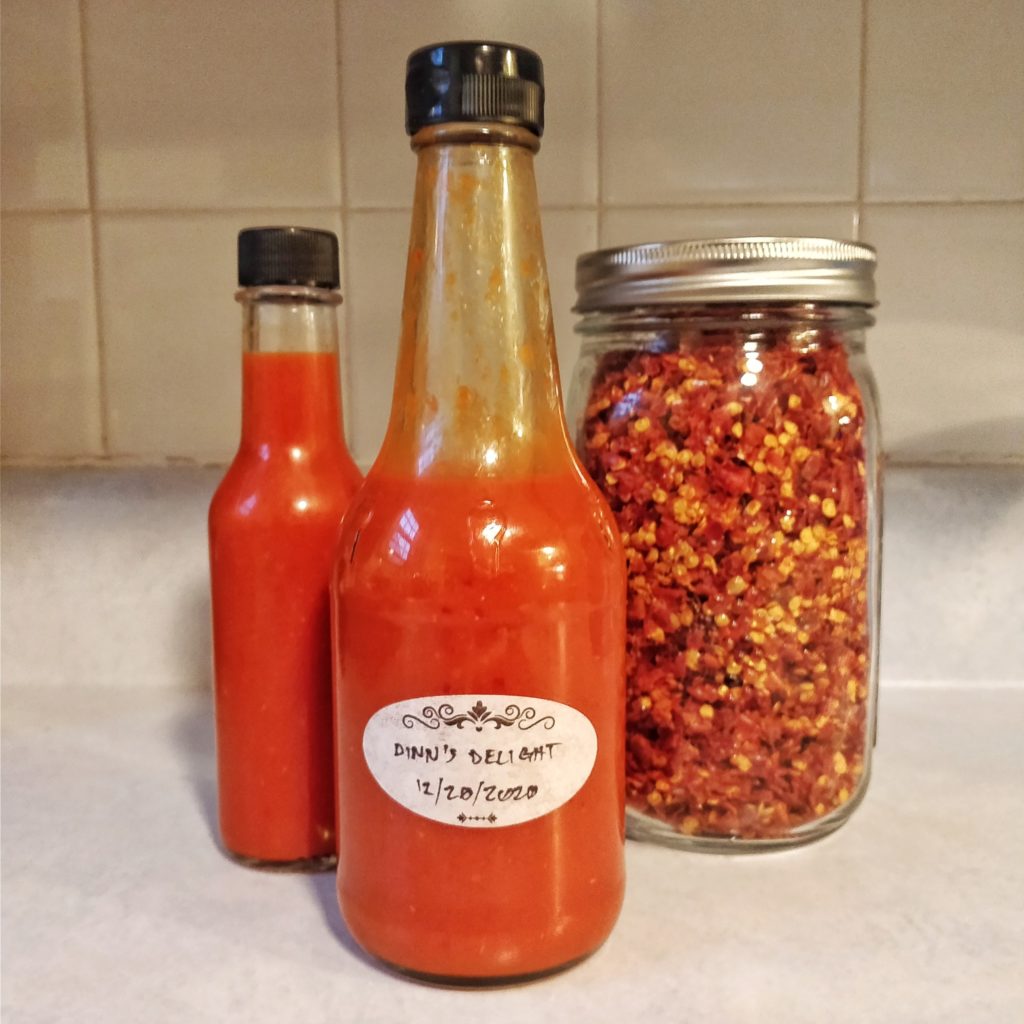
The final weight of everything I could get out of the bag was 1247g. I put it in batches into a food processor to break down a bit, and then through my food mill… it was a laborious process, I’ll be honest. I don’t remember it being such a pain when I made this last year, though some additional liquid from the brine may have helped loosen things up.
After squeezing as much as possible out of the skin & seeds, I was left with 602g of the good stuff—pure, funky chili juice. I put it back into the food processor to add 300g white distilled vinegar, a pinch of salt (the salt percentage I used during fermentation, 3%, was spot on), 1 teaspoon of xantham gum which was pre-mixed with 1 teaspoon of canola oil*, and a naughty 1/2 teaspoon of MSG.
I forgot to measure the total volume, but I ended up with somewhere under a liter of finished hot sauce. I’ve dubbed this one “Dinn’s Delight” after the Goddess of Power from The Legend of Zelda.
And I didn’t toss out the skin and seeds left over! After all, it’s about half of the total weight of the ferment! It went straight into my dehydrator overnight. These are the best chili flakes on the planet, hands-down, and you can also use a mortar & pestle or a high-powered blender to turn it into the funkiest chili powder.
I also have a recipe for a special Num-Numb Sauce that I make with some of these chili flakes every time, if you’re wondering how to use some of these up.
Looking for a community of people doing and talking about stuff like this? Join the Crock of Time Discord!
Think I will try this and then use these pepper flakes instead of crushed red pepper in my beef jerky marinade. Thanks for the idea!
I’ve just been gifted a handheld vacuum sealer, and suddenly wondered if I could ferment stuff in the bags. Yours was the first I clicked on the search link, and you’ve answered it perfectly. With a bonus of chilli flakes on top. Bravo! Do you think it will work for other fermenting projects? (pickled veg etc)
Absolutely! But I tend to reserve vacuum bags for mash-style ferments like hot sauce which are much more prone to mold growth when using other methods.
A few questions. When you let the “air” out and reseal how do you keep from losing a lot of brine?
Also when it’s done and you food mill it do you drain the brine first and if so what do you do with it?
Since this isn’t a brined ferment, the only liquid is juice from the chilies. Even still, when resealing there is a button I can press to manually start sealing, which I press when there is liquid in the bag and it starts rising up towards the vacuum chamber. It certainly doesn’t have to be completely devoid of air, as long as a majority of it gets sucked out.
The beauty of the mash-style ferment is that there is no brine to drain away at the end and then try to find a use for. I mill it straight out of the bag. Sorry if that part wasn’t clear.
Yep – this totally worked, made delicious and ferociously hot, hot sauce, and chili flakes – that were powderized – that is so so very hot that we’re sneezing and wheezing even still. Perhaps fewer Carolina Reapers next time.
So the vinegar to mash ratio is it always about 50% weight? Great instructions btw.
Doesn’t have to be exactly, but it should be at least 20-30% of the final mixture. This ended up at roughly 33% (1 part vinegar, 2 parts mash), but since the chili mash is so thick this helped to thin it out, too.
Great way of fermentation!
I followed your way but instead of adding brine to the bag, I added ice cubes to develop the brine in the process.
Do you think it’ll spoil the fermentation? Is adding ice wrong? Especially if there was garlic in the mix.
I don’t think ice will spoil anything, but I’m not sure it would do anything particularly beneficial either. Adding brine from a previous ferment just helps seed the colony of microbes that are responsible for the fermentation, but it is not required. As long as you’re using fresh chilies, the microbes will be there, just in lower quantities.