Sake ft. Asian Pear
Sake seems to be in a class of it’s own when we talk about alcohol. There are many “rice wines” made around the world, but sake never seems to be lumped in as just another rice wine. There is a prestige and enigmatic quality to sake and its production, whereas something like Korean Makgeolli is seen as a common and sometimes plebeian drink. But we should remember that all of these forms of rice-based alcohol have humble origins, and perhaps sake has achieved this status because of Japan’s strict laws regarding homebrewing—which essentially outlaw making your own. After all, if the only people who can make sake are master brewers or their apprentices, it must be special!
While I’m sure a lot of care and effort go into commercial sake production, you can absolutely make it at home. All you need are three things: rice, koji rice, and yeast. There are an infinite variety of sakes that can be made by selecting different strains of rice, koji, and yeast, and also many variations on the process. I’ll be using a process that works for me in my home kitchen, which will require the below list of equipment:
Equipment
- double-layer bamboo steamer basket
- wok that fits the steamer
- thermometer (I use a laser thermometer so it’s one less possible contamination vector)
- 2 gallon wide-mouth glass fermenting vessel with air-tight lid
- airlock (I prefer the s-shaped style)
- no-rinse sterilizer in a spray bottle (StarSan)
Day 1 Ingredients
- 1kg short-grain sweet rice
- 2.5L non-chlorinated water
- 1 Asian pear
- 3g fresh hops
- 2 tsp yeast (Saflager s-23)
1pm—Wash & Soak Rice
- 1kg short-grain sweet rice
I’ve begun by washing the rice 3-5 times until the water is relatively clear. I have in the past taken the “water runs clear” thing way too seriously and stood there washing the rice for 30 minutes… and it never quite ran perfectly clear. We’re not polishing the rice here as the great sake breweries do, just simply rinsing away the residue left from scraping away the bran, which may produce undesirable flavors. We’re already starting at a disadvantage by not polishing our rice: the outer parts of the rice kernel are mostly composed of fats and proteins instead of the inner starches, which are what is converted to sugar and alcohol. By using short-grain sweet rice there will be a higher ratio of starch. So wash your rice, and accept that our sake will taste a bit “ricier” than store-bought.
After washing, rice has been set to soak in filtered water for several hours, until this evening.
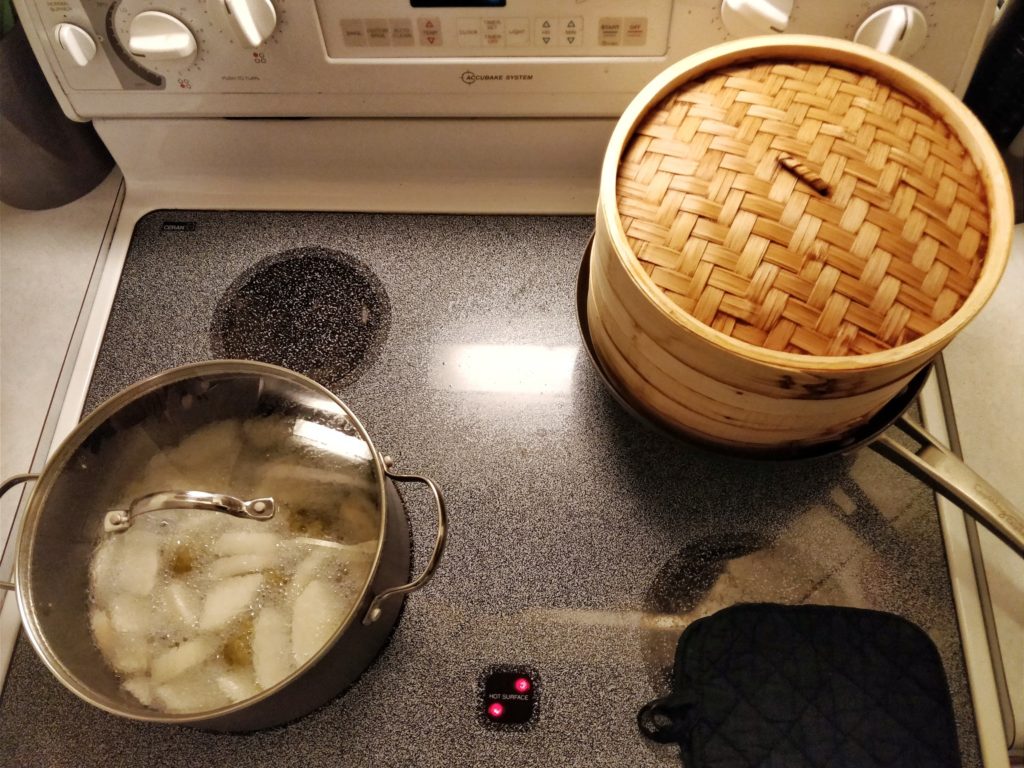
9pm—Steam Rice
While draining the rice, I’ve lined both layers of the steamer basket with “rice cloth”. If you’ve steamed rice before using cotton cloth or butter muslin, you’ve probably been frustrated with the grains that stick to the cloth… well, I have been frustrated by this. Enough that I went searching for something better, and it turns out that there is a thing called “rice cloth/napkin” specially made for this purpose, which is a polyester netting that, so far, the rice does not stick to! I highly recommend it if you make rice wine.
I’m steaming the rice for a couple of reasons. I want to cook it while keeping the water absorption to a minimum, and I also don’t want to accidentally scorch or burn any of it. You can use a rice cooker in a pinch for making sake, but be sure not to let the rice brown on the bottom. I’m also just used to the steaming method for making koji rice, but that’s another post (I’m working on a “Growing Koji at Home” guide, stay tuned).
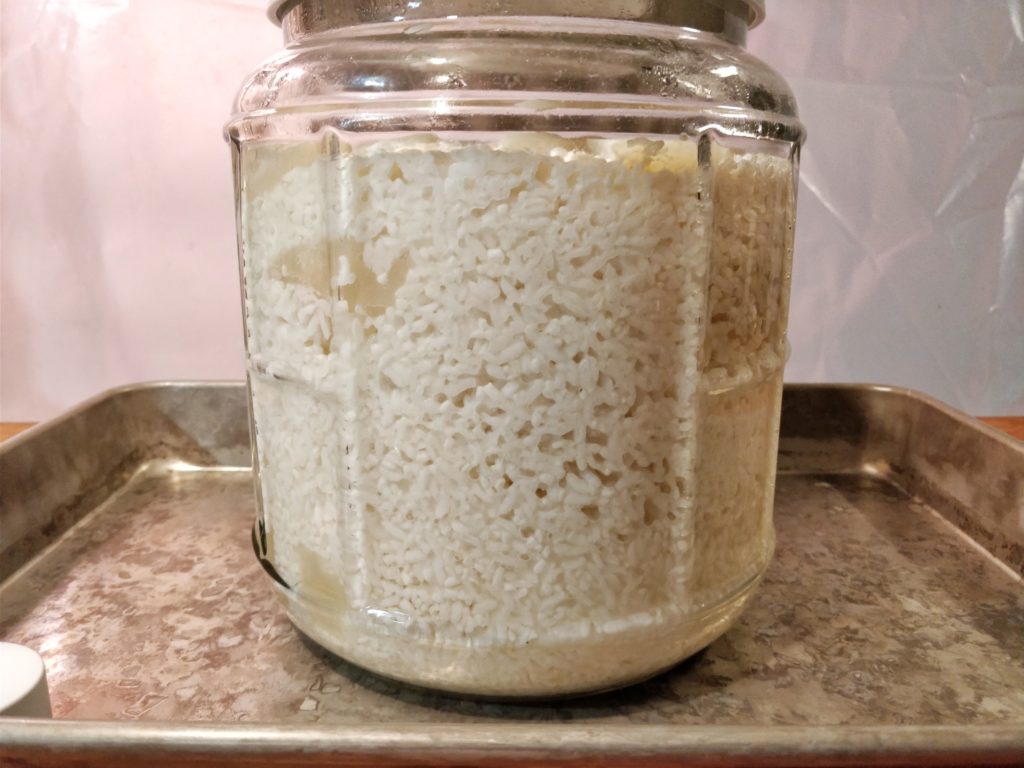
The wok is filled with an ample amount of water, probably 3-4 cups, which leaves about 1 inch of room below the steamer. Once the water boiling, I set the burner to medium-high and set up the steamer basket filled with rice. After 30 minutes, I swapped the layers, check the water level, and steam for an additional 30 minutes, for a total of 1 hour. The rice is slightly translucent, bendable, and can be pinched off with my finger nails.
- 1L water
- 1 Asian pear (425g)
- 3g fresh hops
While I was steaming the rice, I put 1L of water into a covered pot on the stove and brought it to a boil while peeling, coring, and slicing the Asian pear. The pear is not necessary for making sake, but I’ve had it in the fridge for a week and thought it might be an interesting addition. I also picked a handful of hops from the plant in my backyard, my first harvest, which will lend some of their anti-bacterial power to our brew. I simmered the pear and hops in the water, covered, for 15 minutes. I’m hoping to sterilize the pears, eliminating any lactobacillus present.
I’ve also liberally sprayed the glass fermenting vessel with sterilizer, along with a rice paddle for transferring the rice.
10pm—Cool Rice
- 1L water
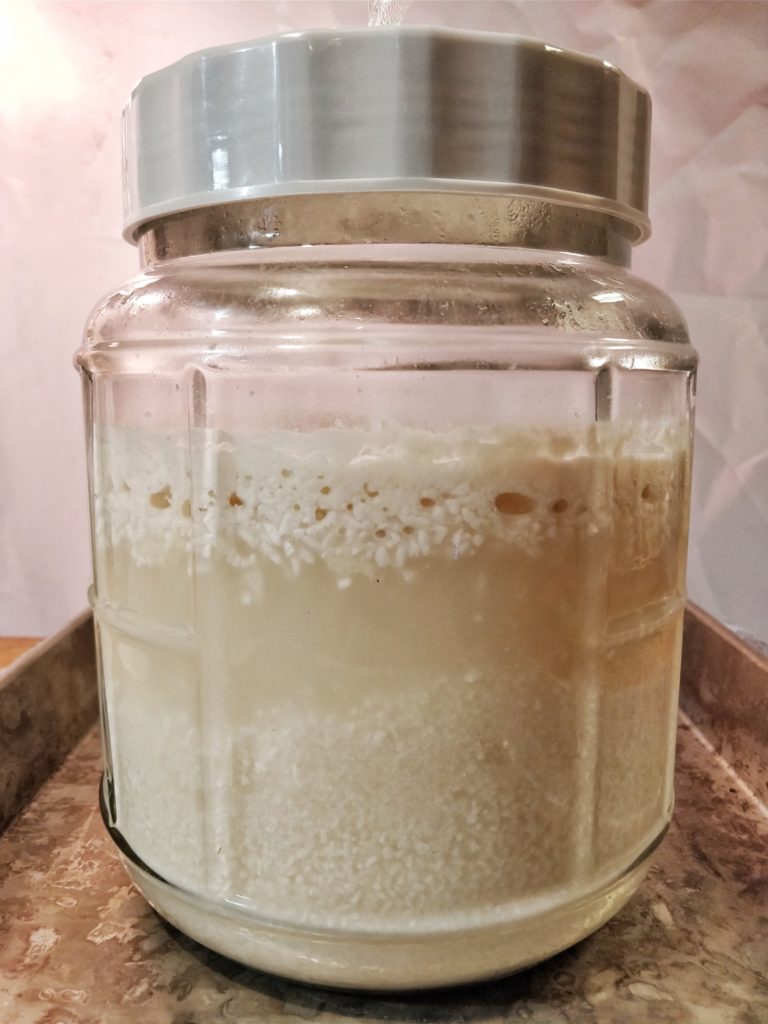
The rice baskets have been set out on the counter to cool off, and the pear water was poured into the glass vessel to cool down in a sterile environment. I’ve added the other liter of water as well to bring the temperature down further. We want everything to get below 100°F/38°C before adding any yeast.
10:30pm—Add Koji & Yeast
- 425g koji rice
- 2 tsp yeast
- 0.5L water
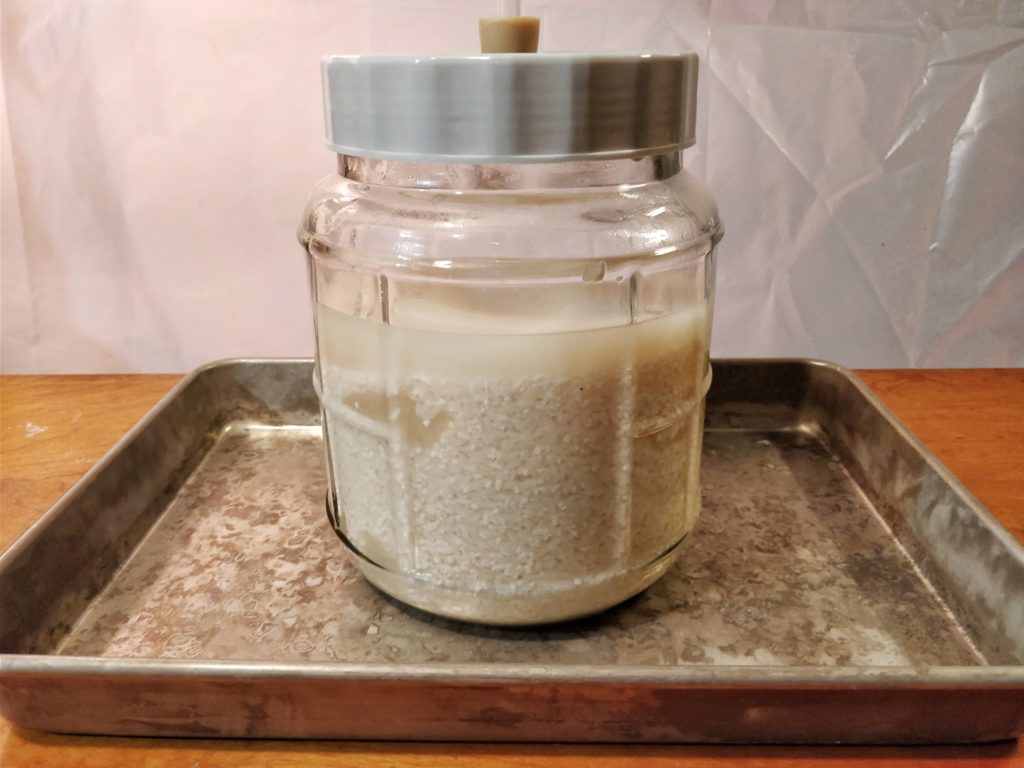
I’s using 425g of koji rice because that’s what I had in a single vacuum-sealed bag.I think most sake recipes will call for the amount of koji rice to equal at least 1/3 the weight of the rice used, and we’re at nearly half. This may give me a chance to add a second stage of steamed rice to the ferment, if the vessel can hold that amount.
I’ve added the koji rice to the vessel, then the sufficiently cooled rice, yeast, and an additional half liter of water and stirred with a sterilized spoon.
The vessel has been capped and the airlock filled with sanitizer and secured in place. I intend to keep the temperature around 66°F/19°C. The ambient temperature in the basement is around 62-64°F, so I’ve placed a seed warming mat under the tray.
Day 2—8/30
9am—The temperature got up to 74°F overnight so I’ve unplugged the seed mat. Ferment is already very active.
8pm—Ambient temp has been hovering around 66°F, but vessel exterior is 70°F. Ferment is still very active, airlock burps about once every 2 seconds.
Day 5—9/2
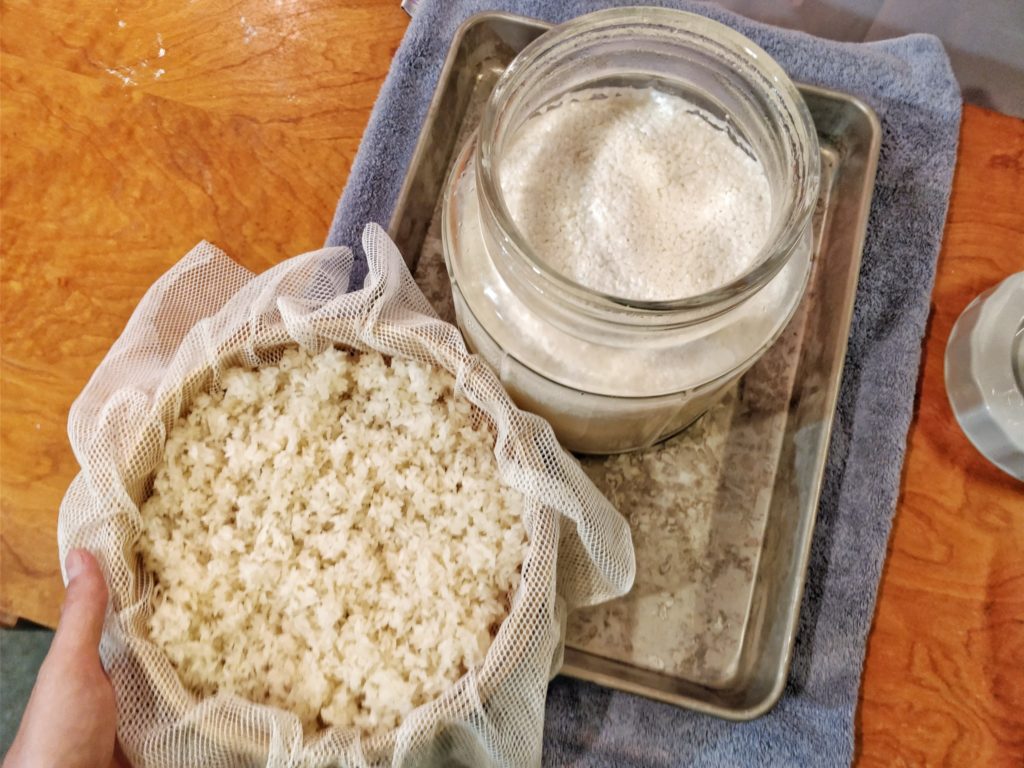
6pm—Washed and soaked 300g rice for adding to the brew.
I’m adding more rice to take advantage of the amount of enzymes available in the brew. It is common practice to do a stepped brewing process by adding more steamed rice and koji rice in stages; we’re just doing this one extra stage. I was considering adding up to 500g, as I have used 1500g rice for 400g koji before. Why 300g? Well, mostly because that was what was left in the bag. But I think 300g will suffice.
9pm—Steamed rice for 45 minutes, allowing to cool.
Temperature of the vessel is just shy of 66°F, so I’ve added the seed mat back, this time with a thick folded towel on top.
10pm—Added rice and mixed with sterilized stirring spoon.
Temperature is getting too high again so I’m turning off the seed mat. After addition of new rice, airlock burps about every 8 seconds.
Day 16—9/13

I’ve taken a hydrometer reading to see how things are going. This would be a lot more helpful had I taken a hydrometer reading at some earlier point for reference, but I was just reading this rather detailed sake brewing guide from Brew Your Own magazine (which I wish I’d found before starting this) which suggests that, following their method, the specific gravity should fall below 1.000. Mine is at about 1.010 and doesn’t appear to be very active anymore, and the flavor is good, so I’ll probably move on to the next step in the next few days.
Day 17—9/14
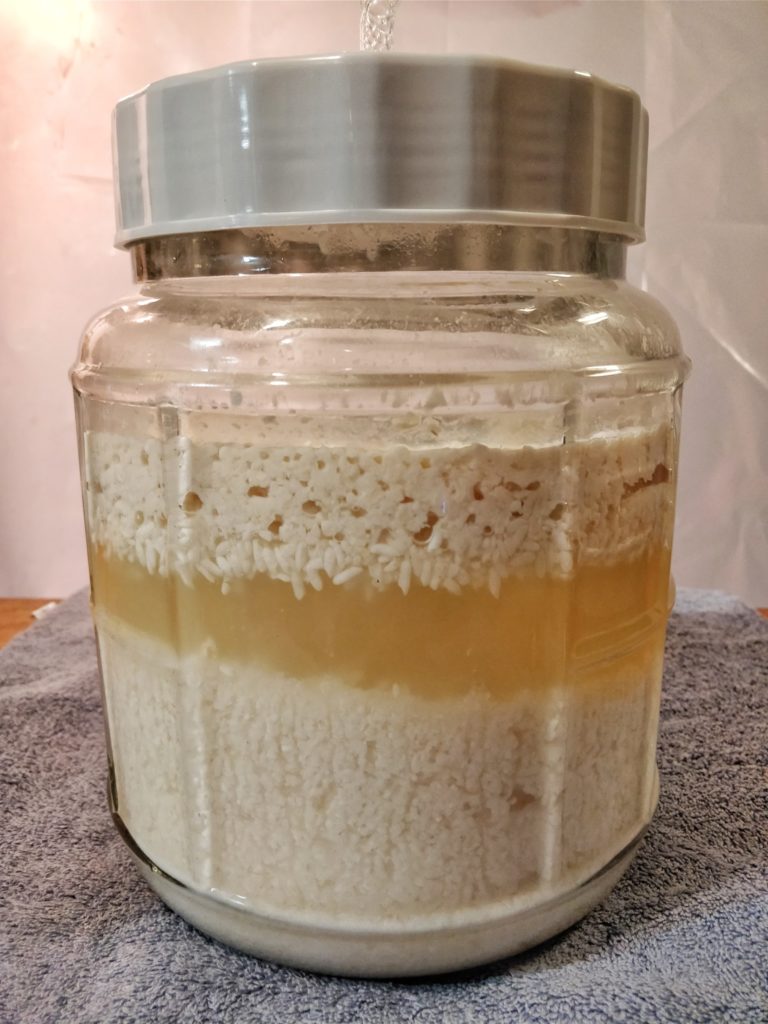
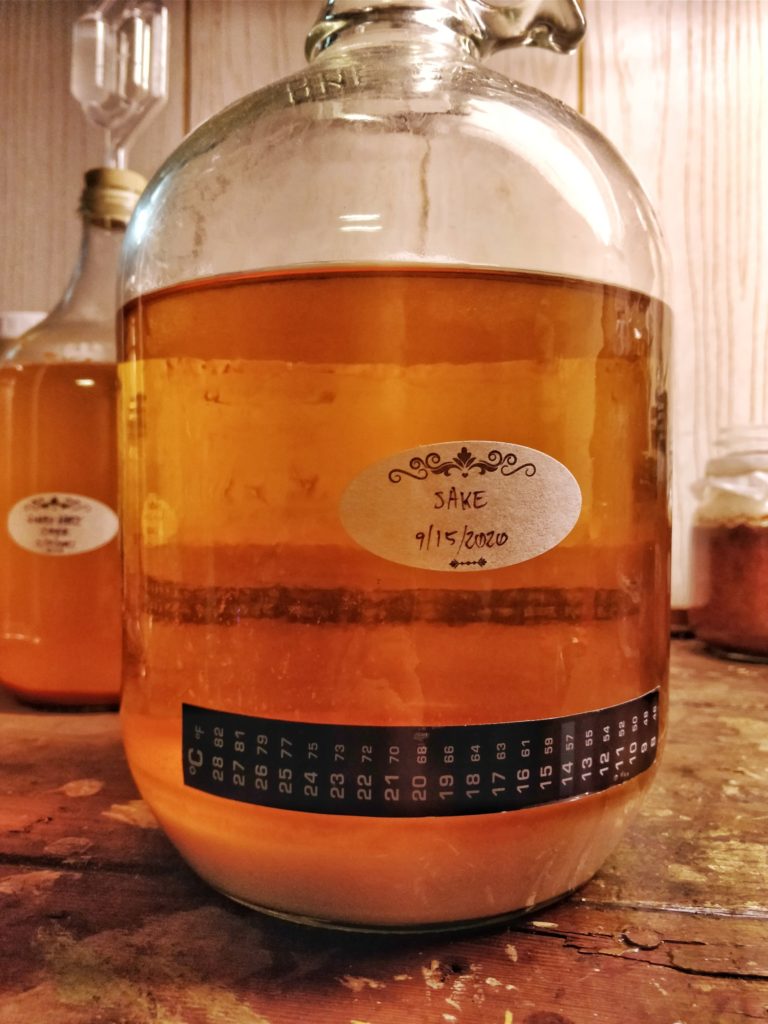
I decided not to wait any longer, as I’m starting to detect some sour notes that I’m not interested in developing. You can see how yellow the liquid has become since last time I posted a photo of the whole container, which similarly happened in the Mirin.
I sterilized a large pot, colander, nylon straining bag, and ladle. After getting most of the contents into the bag, I wish I had done a 2-part straining process with a sieve first to speed up the process, but eventually I got it all in. I rigged up the bag to hang from the ceiling less than an inch above the collander, opting not to squeeze the bag and release too much sediment. Sitting here now, I’m wondering if I shouldn’t have just pressed it a bit to reduce the exposure to oxygen.
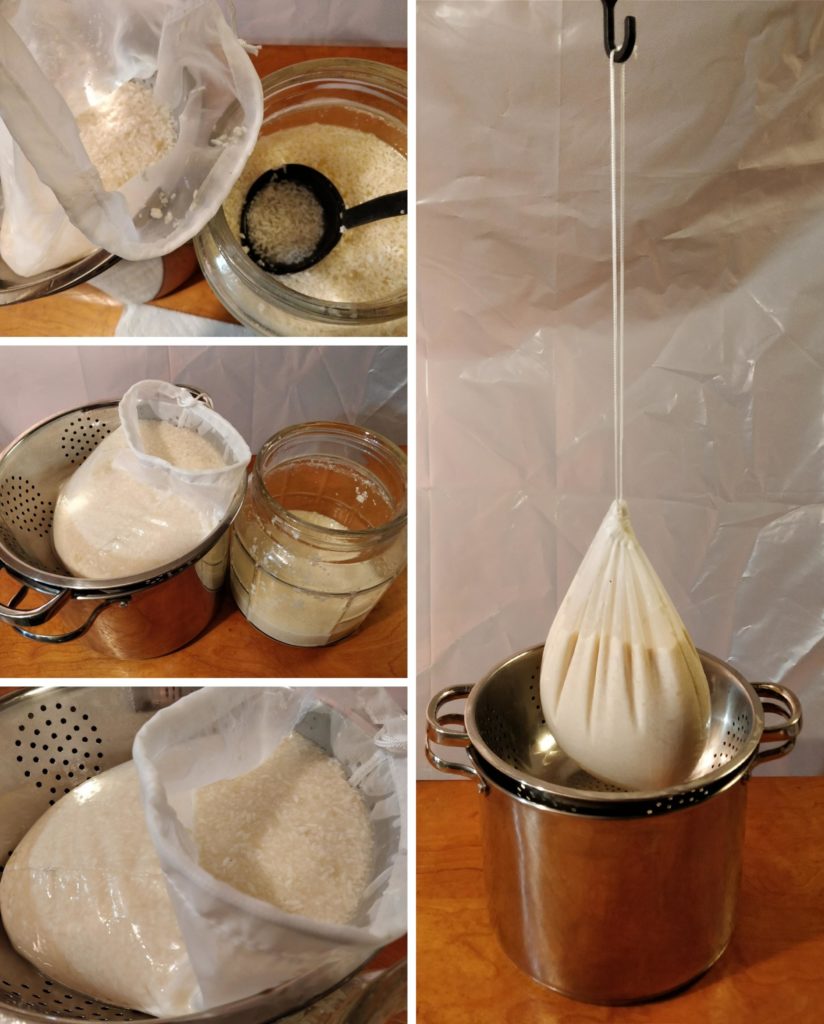
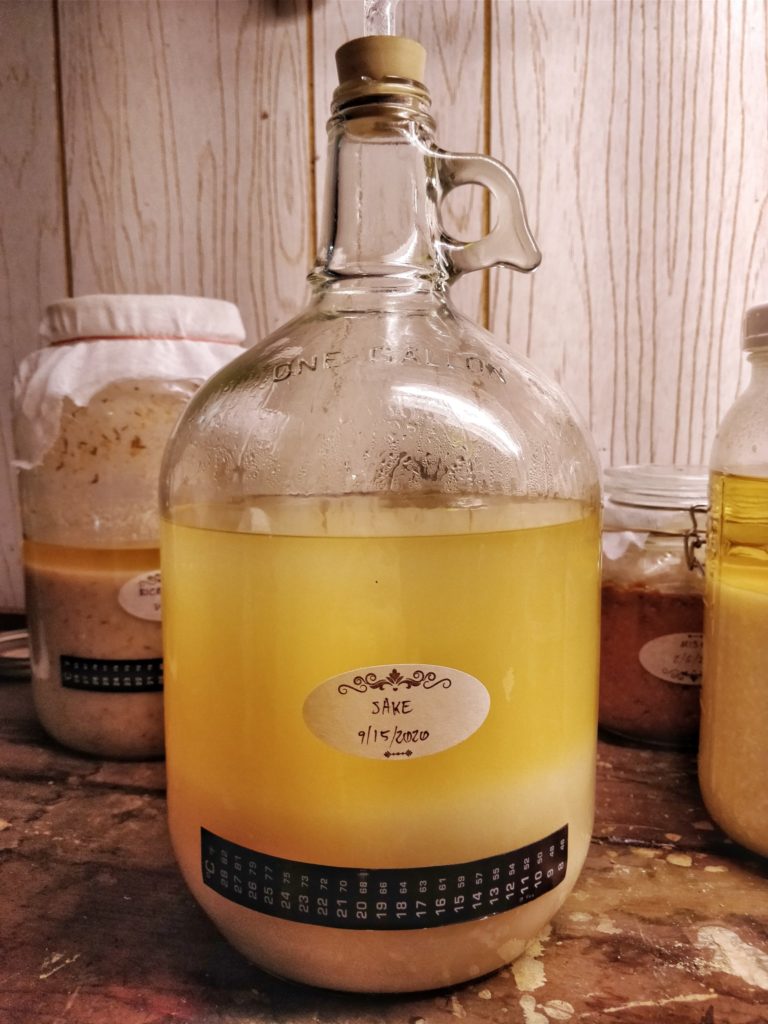
Day 18—9/15
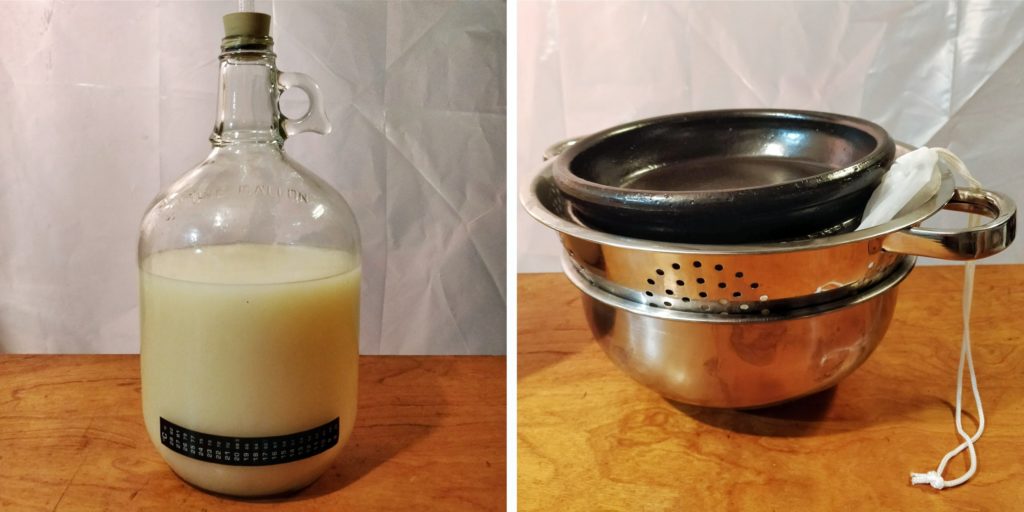
First thing in the morning, I got to work on the strained sake to minimize oxidation. Into a one gallon carboy it went, while the kasu continues to be slowly pressed to reduce the liquid content further.
Some continue to ferment after straining, but the activity is so low on this and I don’t want it to get too sour. The filled carboy went directly into a large enough pot to fit it along with my immersion circulator and water up to the “max” line. I set it to 140°F and let it slowly come up to temperature, and then held it there for 30 minutes.
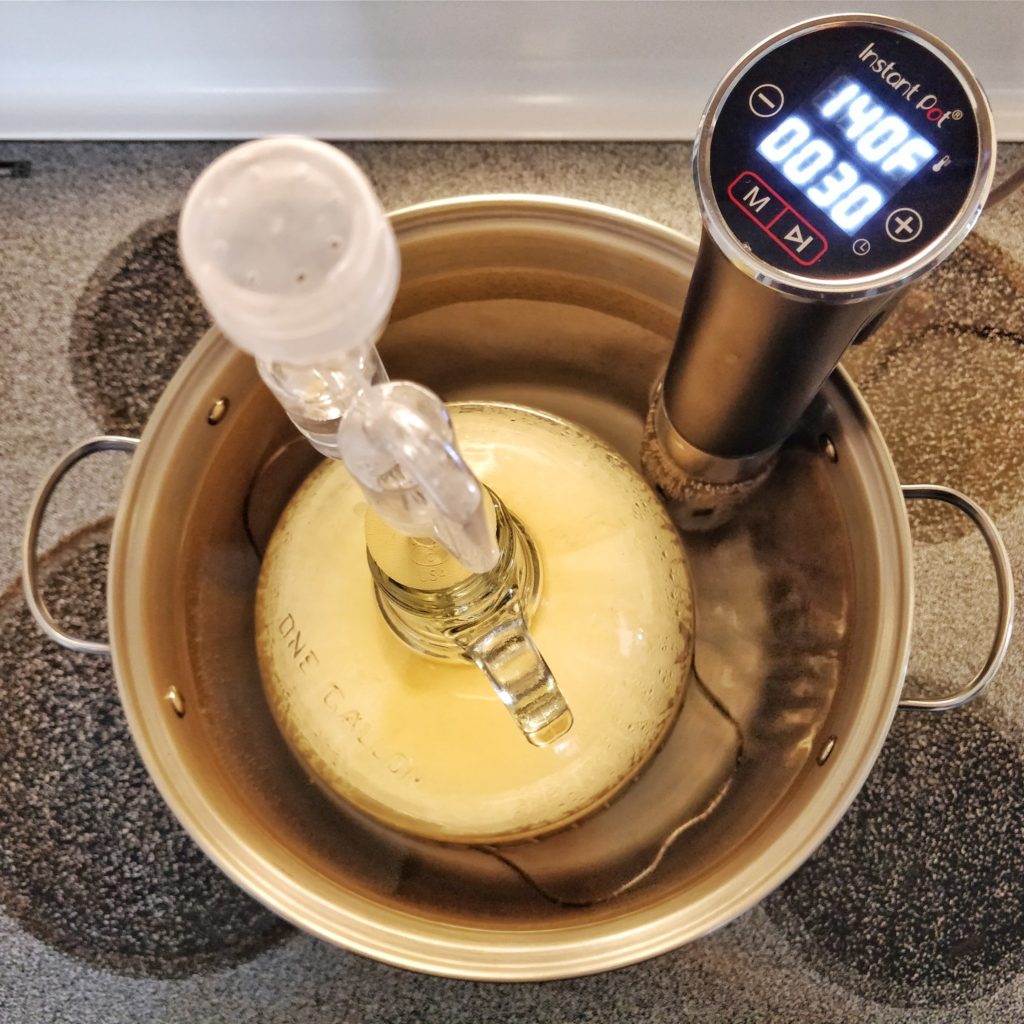
Now the pasteurized sake will age and clarify for 2-3 months in the carboy, after which I’ll bottle and do another pasteurization step. This is quite a task for less than one gallon of sake, but I like to start small before going all-in.
6 months later—3/5/21
Well, better late than never, right? It’s Kojicon, which has reminded me that I should probably bottle this!
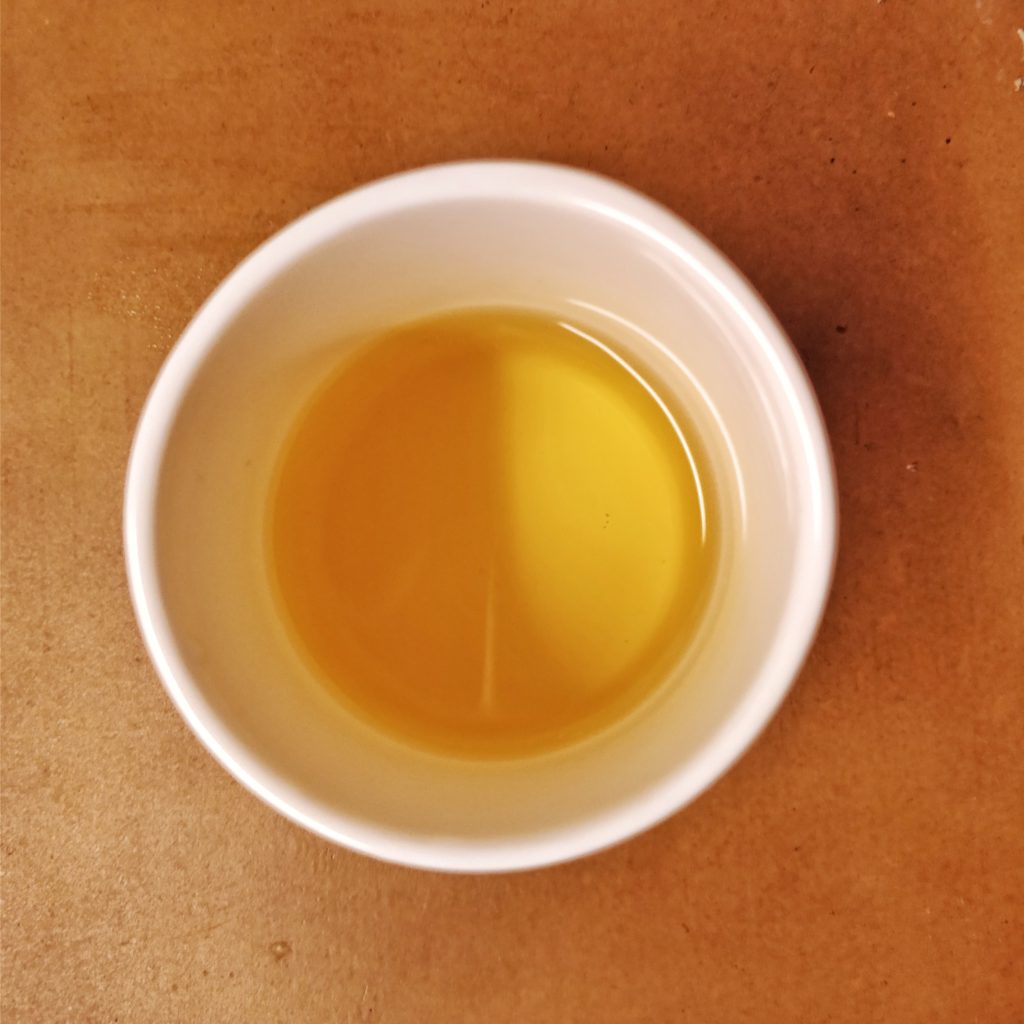
It has clarified nicely, and doesn’t seem to have lost any volume due to the air lock. It has definitely darkened as well. I’ve siphoned off 3 different bottles: a clear layer with no sediment, a cloudy bottle (I happen to enjoy unfiltered sake), and a heavily-sedimented layer right above the lees. It’s interesting how different my sediment looks (almost grey) vs the stuff I buy (nearly white).

The taste is not as “clean” as it was before aging, at least I think. Hard to properly compare to a memory from 6 months ago! I would say that the flavor has a “pungency” that you don’t get from the store. Robust, ricey, and the pear is there but just barely detectable. I’m happy that it doesn’t taste too sour—the pasteurization before aging was definitely a good idea in this case.
I’m re-pasteurizing in the bottles so that they don’t explode when I go to open them.