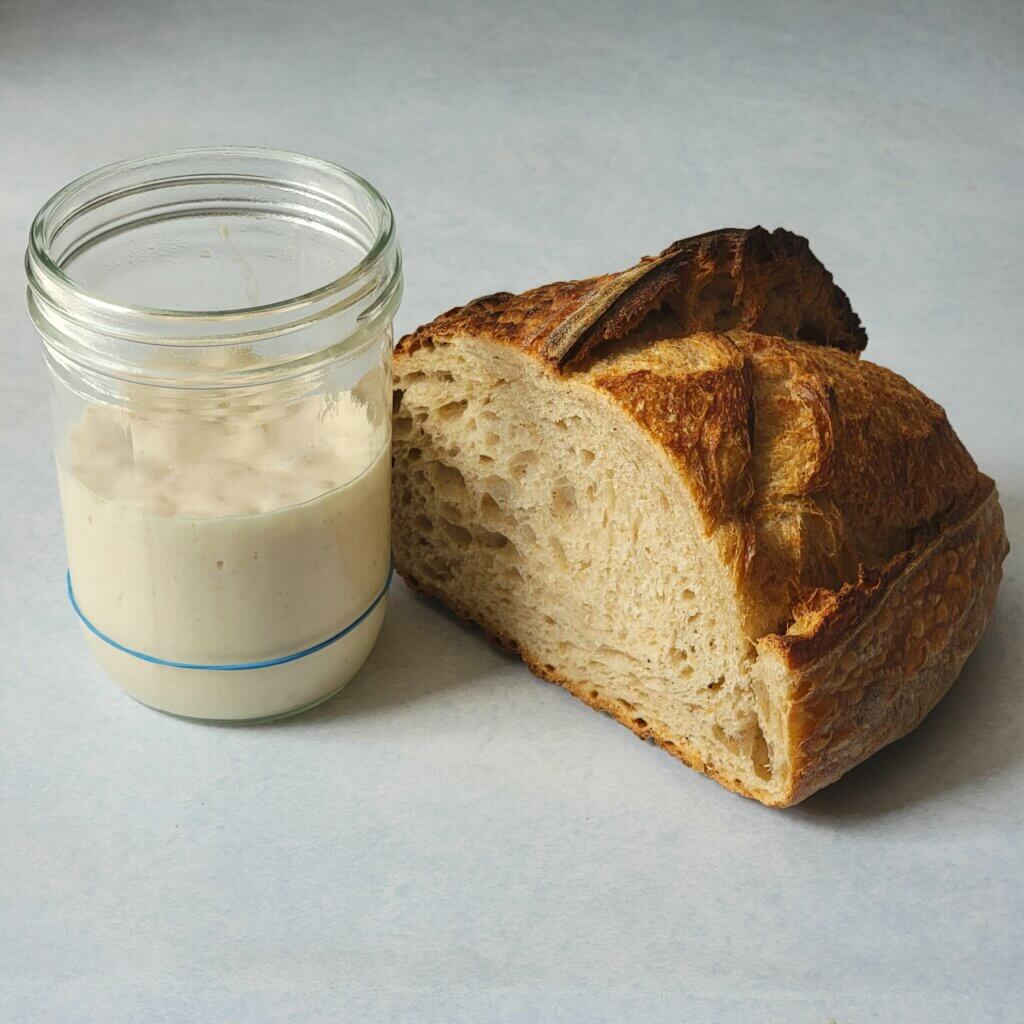
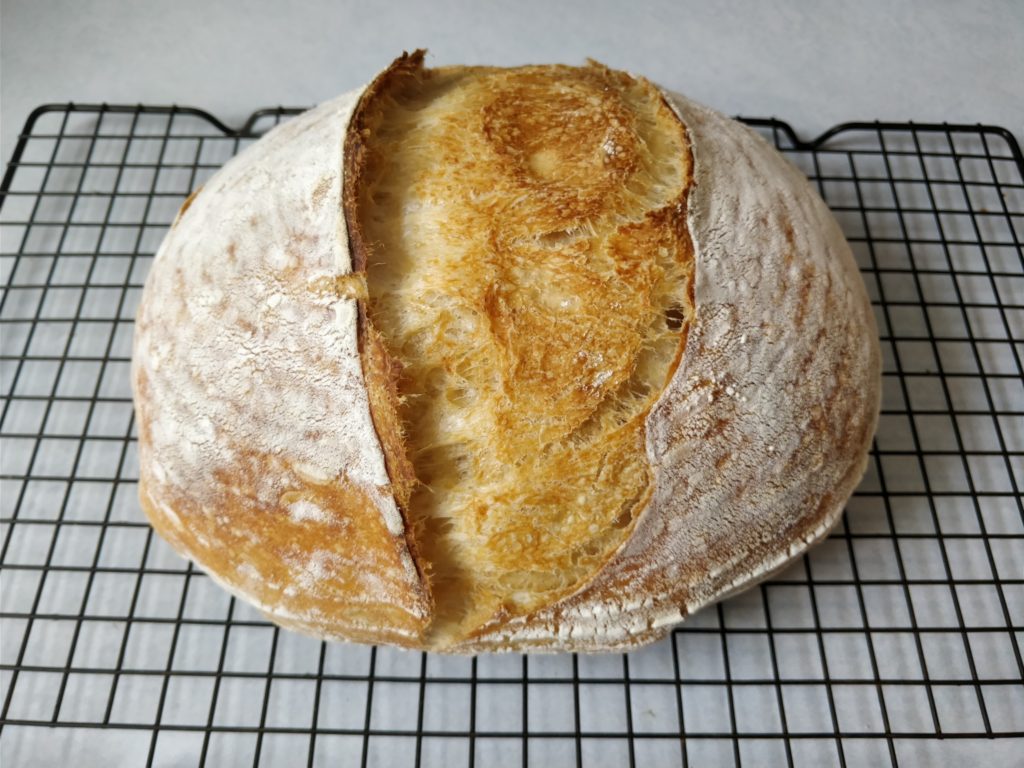
Quarantine Sourdough
Happy Towel Day! We’re going to make good use of our towel in this recipe.
I went into the COVID-19 pandemic without much in the way of yeast or flour. Do you know someone who started a sourdough starter during lockdown? Maybe it was you! It seems like everyone was baking during quarantine, or else they were all just hoarding flour. Regardless, I managed to find all-purpose flour at the local Korean grocery and began developing an easy sourdough bread recipe. It took 2 months to really figure it out, so let me save you some time and run through the basic steps that will get you a perfect loaf every time.
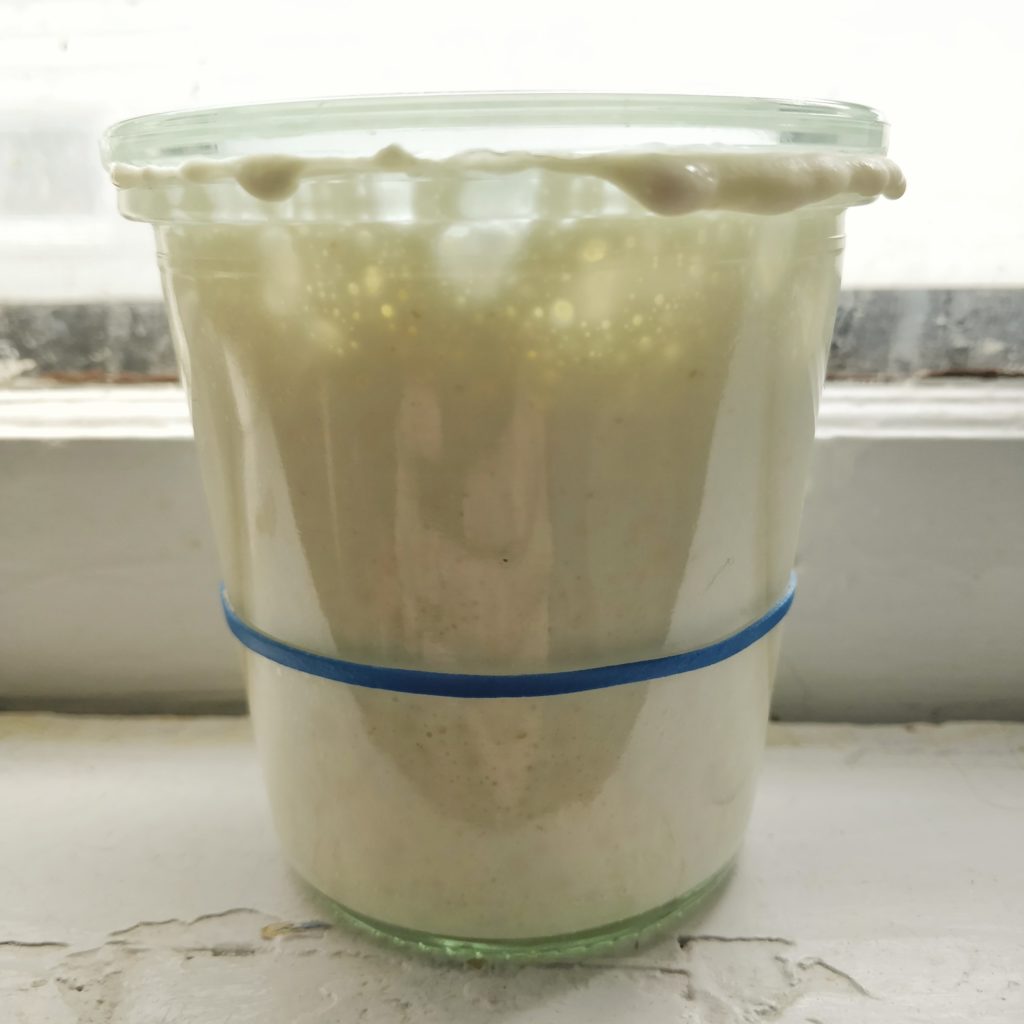
1. Strong Starter
I recommend feeding your starter once per day, at least in the beginning, to get to know its lifecycle. I keep two rubber bands on my starter jar, baseline and peak, so that I can observe when it hits its peak (or surpasses the record) and when it falls back to baseline. At the beginning, you may be feeding at a 2:1:1 (starter:water:flour) ratio, but if you want to build up its strength, you’ll want to feed at the right point in the lifecycle. I have been adjusting the feed ratio to use a smaller and smaller proportion of starter in order to time the rise and fall to approximately 24 hours or less. I currently am feeding with 10g starter for 100g total, which is around 1:4.5:4.5.
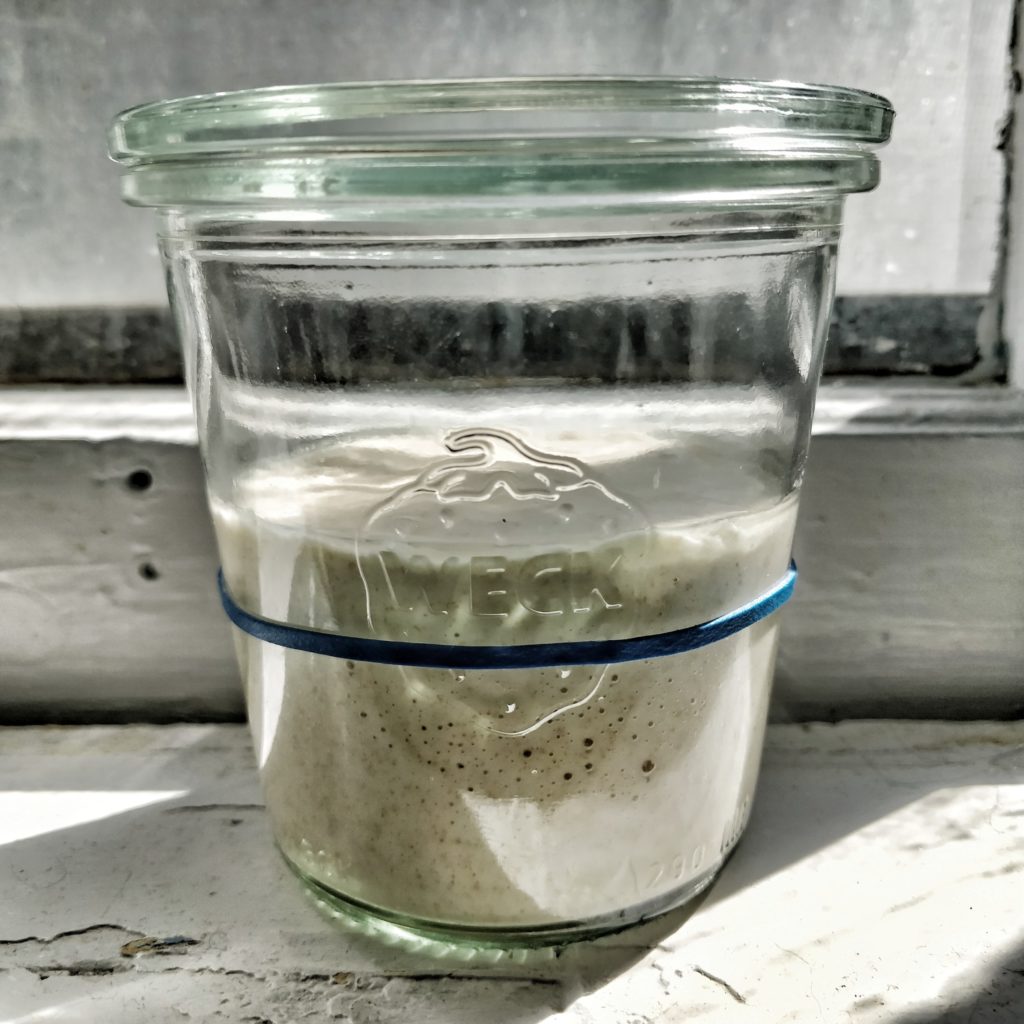
2. Levain
Your starter doesn’t necessarily need to be at its peak to start this step, as this is basically a way to create a large amount of starter that will be at its peak when you mix up the final dough. Put your levain* into a mason jar or similar see-through vessel so that you know precisely when it’s ready to use.
3. Autolyse
The autolyse* step is simply a way to overlap processes to reduce the length of the entire process by about an hour. It’s worth it when you’re trying to fit your dough prep into one day.
When you wet the flour, you hydrate enzymes that begin a chemical process that results in the formation of gluten, among other things. It takes around 45 minutes or so for a dough to fully hydrate, so do yourself a favor and mix it up at least an hour before you plan to add your levain.
4. Stretch & Folds
Stretch & folds are part of pretty much any recipe you’ll find that touts itself as a “no-knead bread” recipe. The fact is, bread dough needs kneading, whether it’s fast or very, very slow. Kneading helps distribute the masses of gluten produced by autolysis in a way that is beneficial for the shape of our final loaf, and so too does stretching & folding.
Continually stretching the dough and then folding it into itself, and then allowing some time for it to “relax” before folding again, turns a messy web of gluten into something more akin to a ball of rubber bands. I recommend doing stretch & folds every 30 minutes over the course of 2 hours, and using the windowpane test before moving on to bulk fermentation.
The windowpane test is simply stretching some of the dough between your fingers to see if you can get it think enough to let light through without tearing.
5. Bulk Ferment
This is, I’m embarrassed to say, the part that tripped me up the most. For any other bread recipe using commercial yeast, you expect the dough to rise by at least 2x before it’s ready to bake—not so with a sourdough. Your bulk rise, depending on the ambient temperature, should only go for around 4 or so hours, and may only rise at most by half its original volume. If your schedule is incompatible with that timeframe, you may be able to bulk ferment in the fridge for 8-12 hours instead.
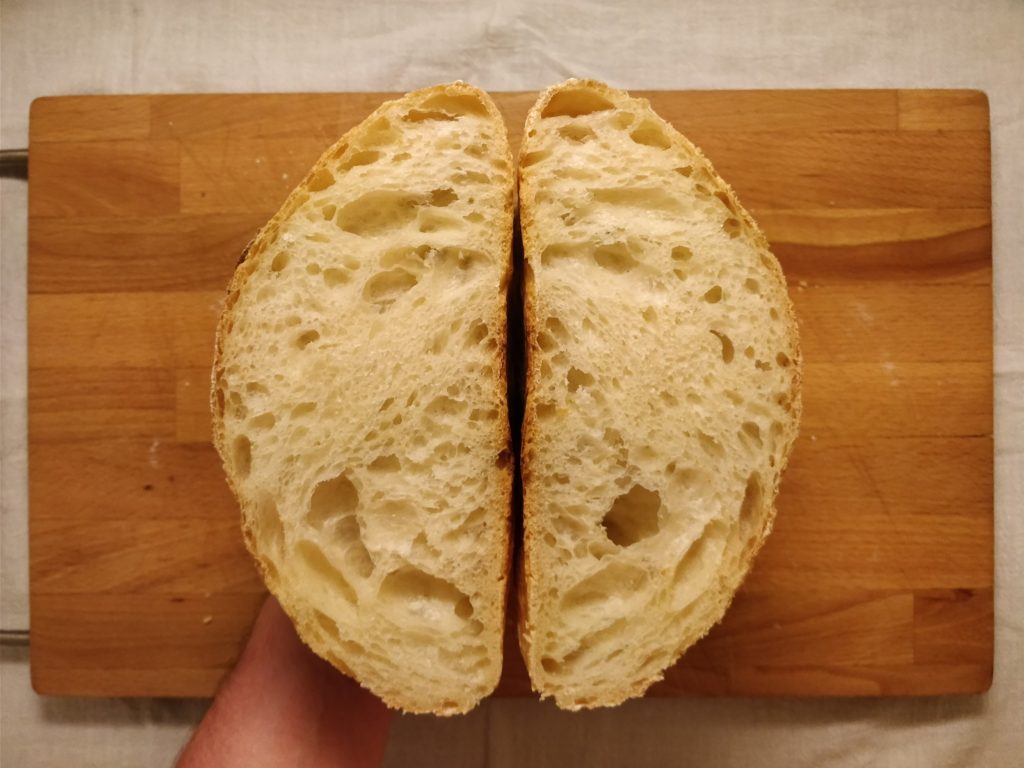
6. Shaping
Shaping the dough before it’s final proof reinforces the shape you want your final loaf to be. This involves 2 sub steps, the pre-shape and the final shape. The pre-shape is like a final stretch & fold, but this time you do it on an unfloured surface, flip it onto the seam, and use your bench scraper to turn and pull it to build some tension across the top. Let it rest for 15-20 minutes to relax, and then do the final shaping.
There are many, many ways to do the final shaping, and they generally depend on what the shape of the loaf and your proofing basket is. I have had good results with the trifold-rollup method.
7. Final Proof
The final proof should be done in the fridge, for a number of reasons. One, it helps build flavor slowly; two, a cold dough is easier to work with as you prepare to put it in the oven, and definitely easier to score; and three, a cold dough will rise better in the oven, since it will release steam slower and more evenly.
The proofing basket you use will dictate the final shape of your loaf. I like my round rattan banneton, and I generally use it without the included cloth covering. If using a normal bowl or proofing basket with a cloth, rub a generous amount of flour into the cloth. If not using the cloth, wet the banneton until it drips, knock out excess water, and dust with rice flour. Put in enough rice flour until it no longer sticks and dump out the excess.
8. Scoring
Scoring the dough right before baking provides a means for the bread to expand and steam to escape, making for better oven spring.
9. Baking With Steam
Steam is important for the first 20 minutes of baking, as it prevents the surface of the dough from hardening so that it can rise as much as possible. I prefer the dutch-oven method as it is the simplest: just bake for the first 20 minutes in the preheated dutch oven with the lid on, which prevents the dough’s own steam from fully escaping.
If you don’t have a dutch oven, you can also put a tray on the oven rack below the bread and throw some ice on it when you put your bread in. You may need to remove this tray after 20 minutes if there’s still water in it, which can be precarious.
After the first 20 minutes, bake for at least another 20 or until your desired crust darkness is achieved.
One final tip, if you want your bread nice and crusty: when the bread is almost done, turn off the oven and crack open the door for the final 10 minutes. This will allow steam to escape, achieving a super crispy exterior.
Quarantine Sourdough
Ingredients
Levain—200g total
- 50g starter
- 75g water
- 75g flour
Dough—660g total
- 400g all-purpose flour
- 250g water
- 10g salt
Process
Levain
- This is best started any morning of lockdown, because you’ll be home anyways. Mix together the levain ingredients: combine starter with water in a bowl, then add flour and mix until incorporated.
- Put into a pint-sized mason jar and place somewhere warm, around 80°F, for 4-6 hours. The amount of starter you used and the ambient temperature will dictate how long this takes. If you want to ensure it happens within 4 hours, set it in your oven with the light on and the door cracked open.
Autolyse
- At least an hour before you expect the levain to be ready, mix together the dough flour, salt, and water. Cover with a damp towel or lid.
- When the levain is ready, pour it over the dough and mix vigorously until incorporated. This can be messy and tiring—no one will judge you for doing it in a stand mixer.
Stretch & Folds
- Scrape the dough into an oiled bowl. Turn it over to coat, and then perform the first set of stretch & folds. Cover with a damp towel.
- 30 minutes later, do another set of stretch & folds and re-cover. Repeat this for 4-6 times total within the first 2 hours.
- The dough is ready for bulk fermentation when you can perform the windowpane test.
Bulk Fermentation
- Cover bowl with a damp towel and place somewhere warm once again for 2-4 hours. You want the dough to get bubbly and rise by half of its current volume at most, and once again this can be sped up in the oven, off, with the light on and the door cracked open. Do not over-proof!
Shaping
- Remove the dough to an unfloured surface. Perform a final set of stretch & folds, being as neat as possible. Flip over with your bench scraper and shape by turning and pulling the dough ball towards yourself a few inches, which should build some tension across the top and create a nice round shape. You only need to perform this pulling motion maybe 4-6 times.
- Lightly flour the top of the dough and either cover with a large bowl or your damp towel. Let it rest for 20 minutes.
- While the dough rests, prepare your proofing basket.
- After the dough has rested, dust your surface and the top of the dough with flour. Flip dough using your bench scraper onto the floured surface and perform the final shaping.
Final Proof
- In one concise motion, lift the dough and gently place it, seam-side-up, into your proofing basket. Dust the surface with some flour, especially around the edges.
- Put the basket into a plastic bag, and while closing it make sure it is inflated so it’s not touching the top of the dough. Secure the bag closed with a rubber band or twist tie.
- Place in the fridge overnight, or at least 8 hours.
Scoring & Baking
- Place your dutch oven into the oven and preheat to 450°F for 45 minutes to an hour.
- When everything is hot and ready, pull the proofing basket out of the fridge. Remove the plastic bag, then upend the basket onto a piece of parchment paper. If you like, dust the top with some additional flour and gently rub it smooth. Score the dough however you’d like, though I highly recommend a simple single score down the center at a 45° angle for a nice “ear”.
- Pull the dutch oven out, remove the lid, and carefully set the parchment paper with dough on top into it. Optionally mist the top with some water, then quickly replace the lid and put the pot back into the oven.
- Bake for 20 minutes.
- After 20 minutes, carefully remove the lid of the dutch oven. Continue baking for 20-30 minutes, until your desired doneness is nearly reached.
- Once the loaf looks just about ready, if you want a crispier crust, turn off the oven and crack open the door for a final 10 minutes.
- Remove loaf from the dutch oven onto a cooling rack so the bottom doesn’t scorch. Allow to cool completely before cutting open, unless you plan to eat the entire thing in one go!