Blackened Koji Coffee Beans
When folks get into koji, inevitably they want to know what koji would do to coffee. Can you grow koji on green coffee, and would it result in something good? Now that the question has been answered (grown of the fruit directly as part of the processing*), I have something different in mind: blackening.
Blackening is the process of really slowly cooking something over the span of weeks. It is most often used to make black garlic (see my Wild Black Garlic logbook) but other vegetables, fruits, and nuts can be blackened as well.
Now, the question you’re probably asking yourself is: “Would blackened coffee even be any good? Is it worth the time?” Well, I don’t know the answer to that yet, but we’re going to find out.
The Noma Guide to Fermentation describes blackening in simple terms as “very slow, very dark browning” which is achieved through the Maillard reaction over a long period of time at a low heat which is just high enough to prevent fermentation.
This works best with things that have a relatively low moisture content, while not being completely dry. They did blackened hazelnuts in the book, which I’m hoping is broadly equivalent in moisture and oil content to our green coffee beans. This does usually change the texture as well, so it’s likely I won’t even be able to grind it for making coffee, but one step at a time.
Regardless of what you are blackening, the process is the same: hold at 140°F/60°C in a sealed environment for a month or two. This is an optimal temperature for lots of different enzymes to work their magic while being completely inhospitable to bacteria, yeasts, and other microorganisms.
You might now remember that I started this logbook talking about koji. Alana in the Crock of Time Discord recently posted a link to a brief recipe for blackened koji, which mentions that it only takes a week instead of a month or more, likely due to the hugh amount of enzymes present. Since I’d like to try my own blackened koji, I’ll do it at the same time and also do a koji coffee experiment!
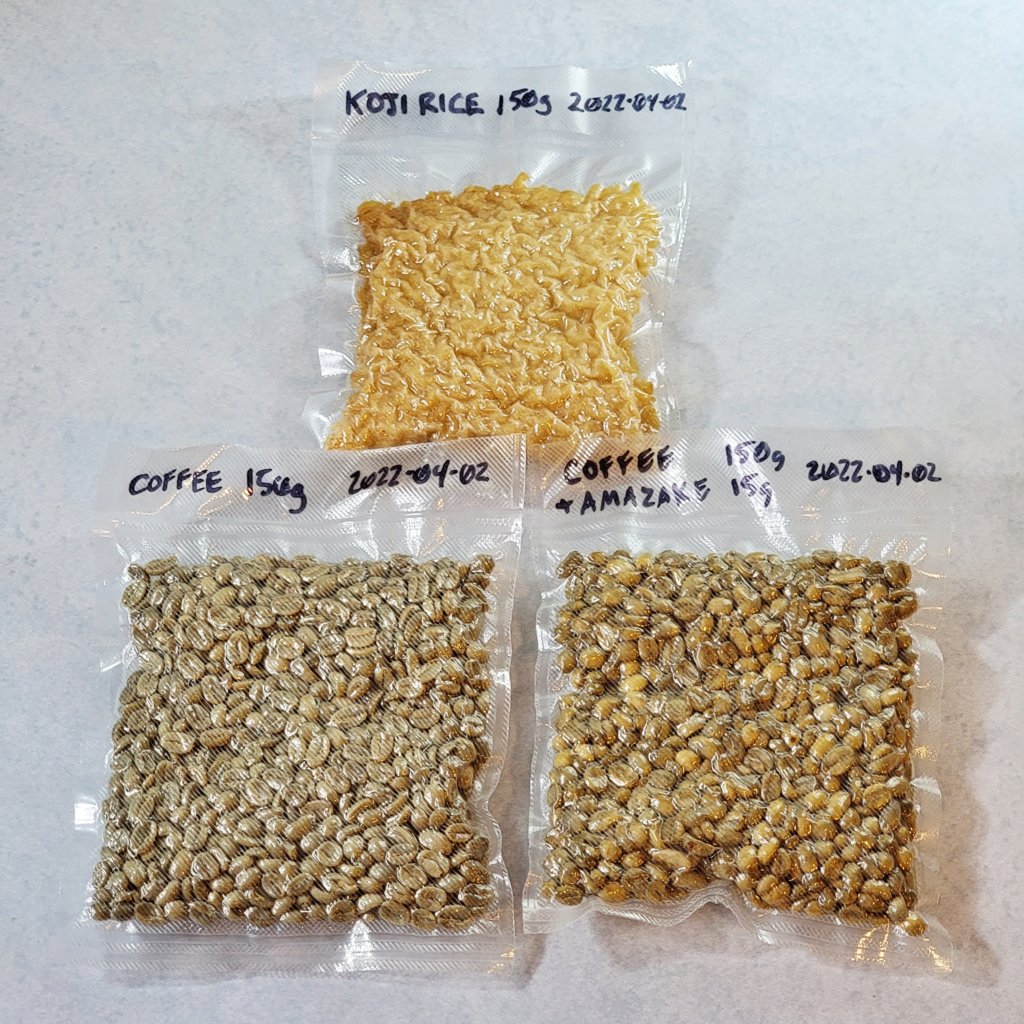
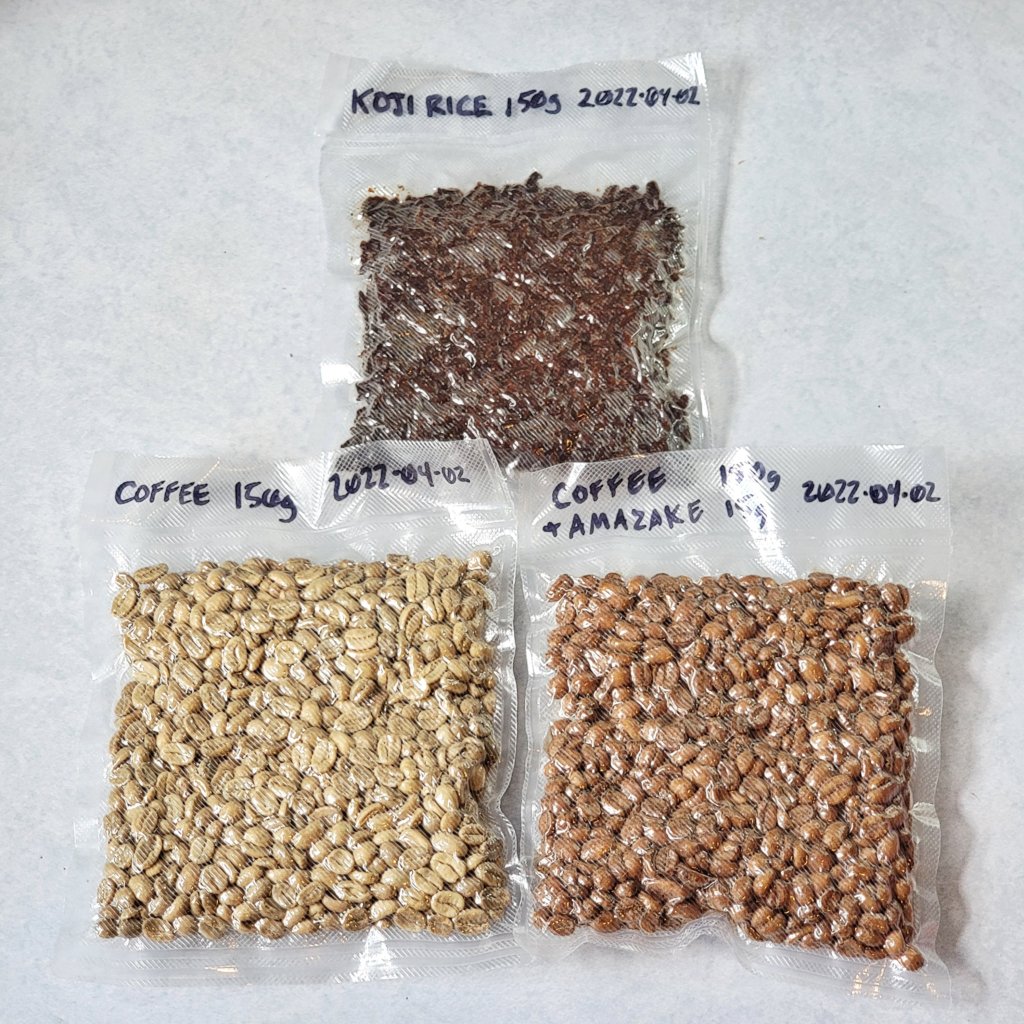
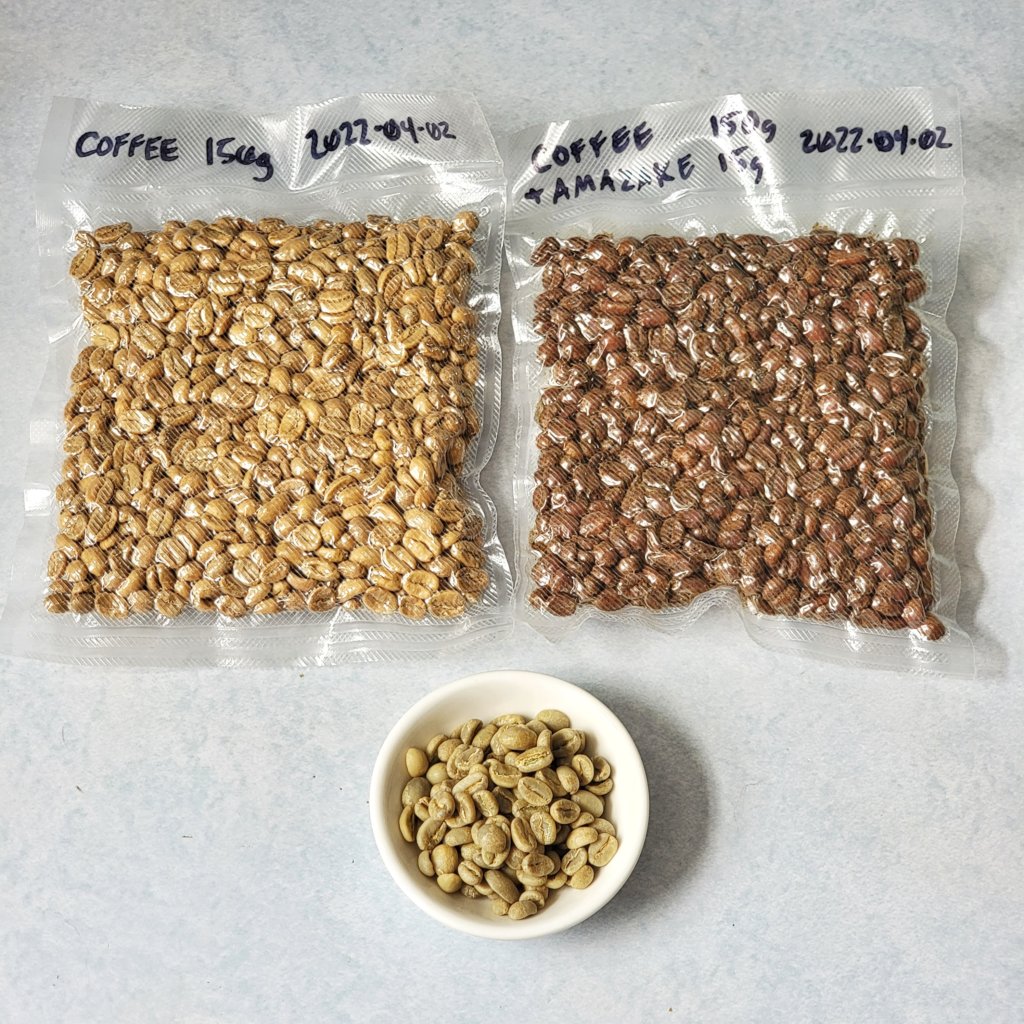
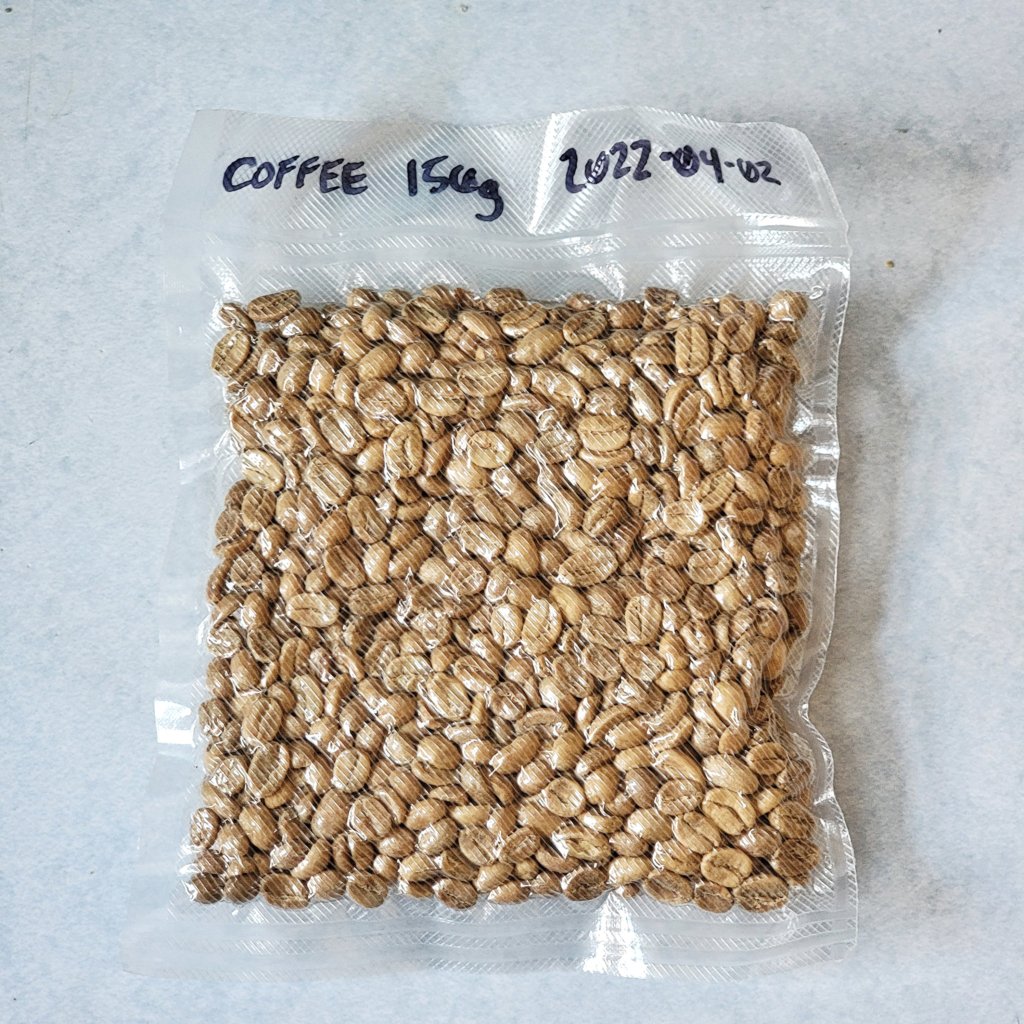
Day 1—2022-04-02
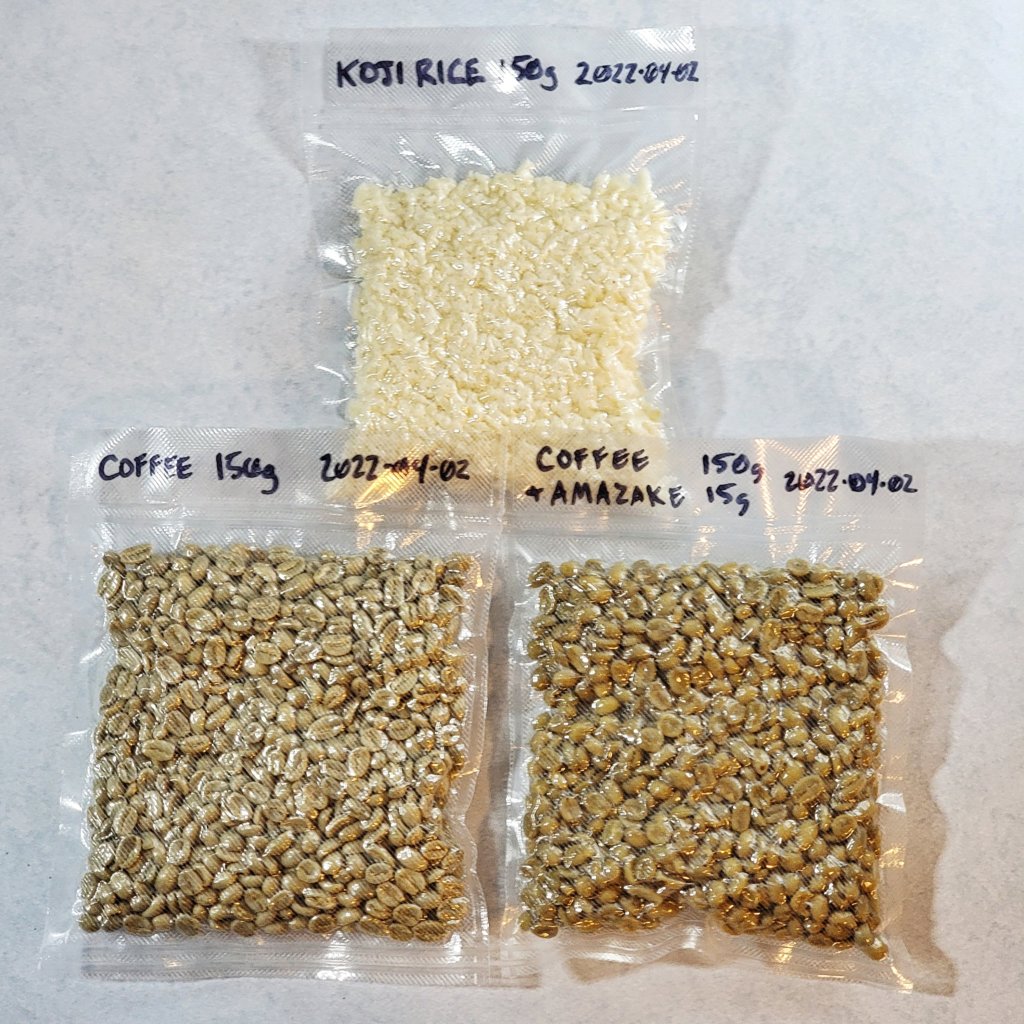
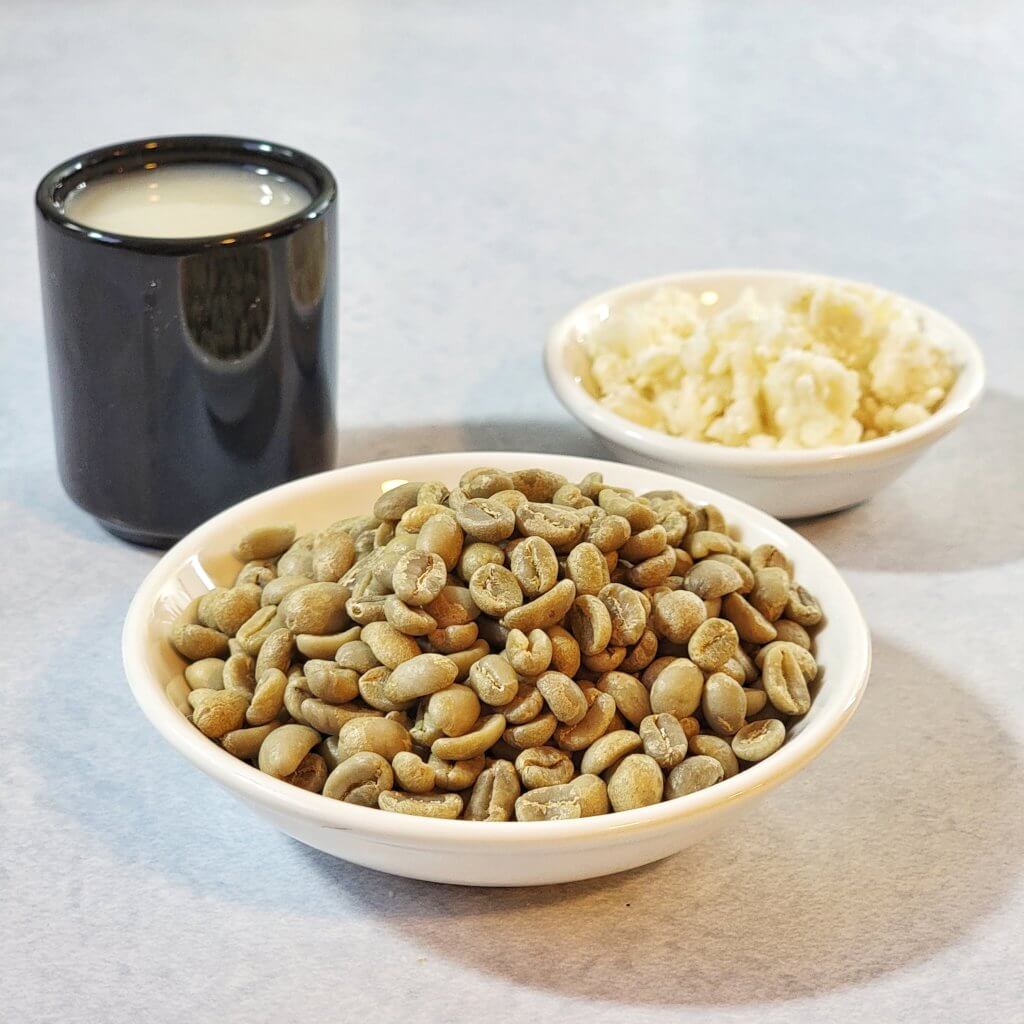
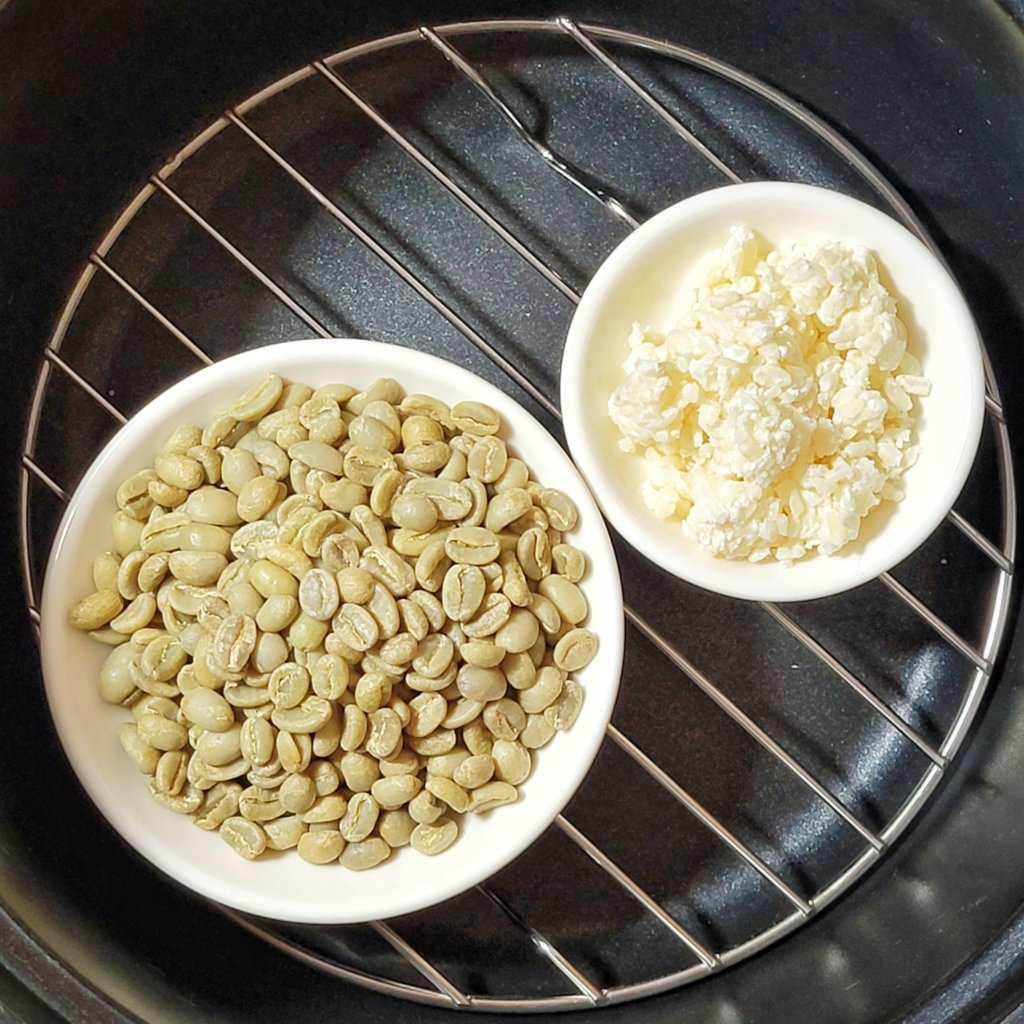
I prepared 3 5×7″ vacuum bags:
- 150g green coffee beans
- 150g koji rice
- 150g green coffee beans + 15g amazake
I figured that for the experimental application of koji to another food we are blackening, it might work best using a small amount of liquid koji, AKA amazake, to just barely coat the surface. 10% by weight seemed to do the trick, though that might change for things with a different surface area to weight ratio.
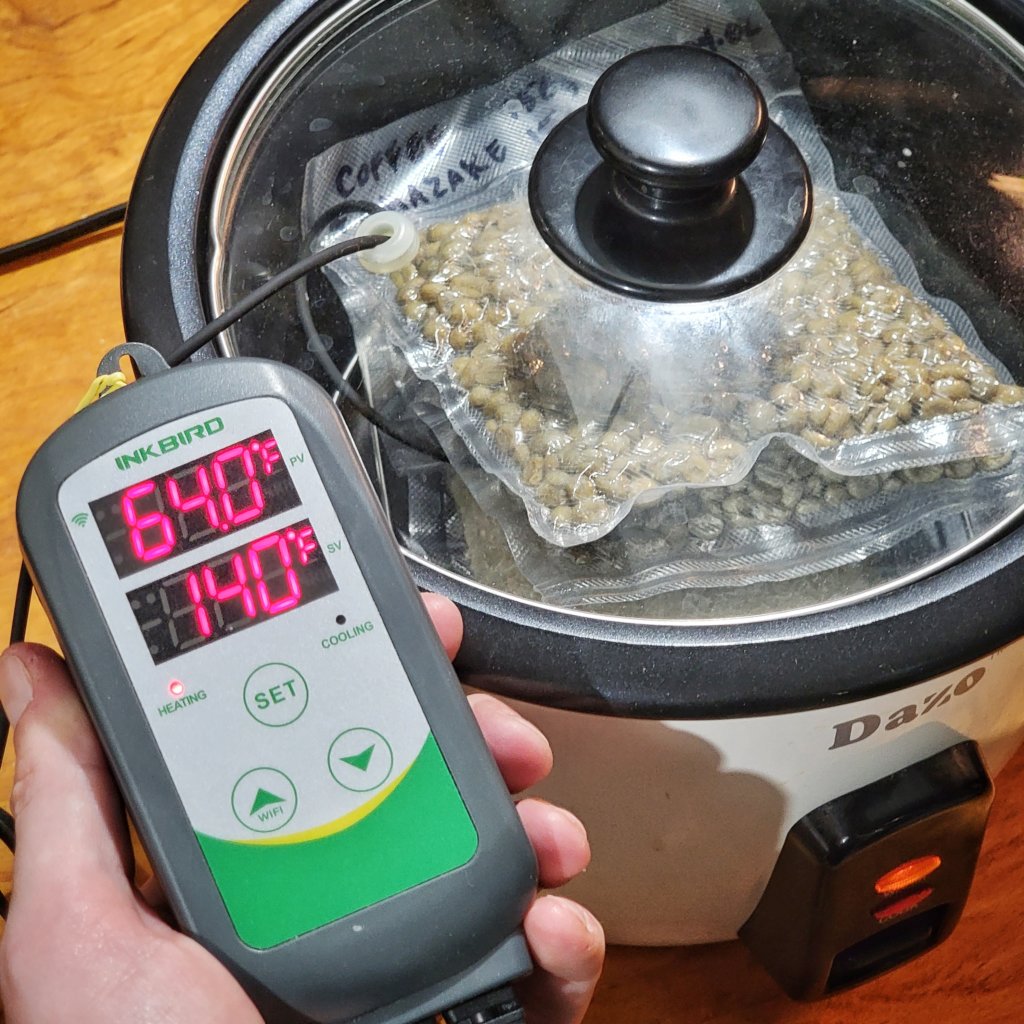
These bags were set on a wire rack in my cheap old rice cooker set to “Keep Warm” (the default when plugged in). Because I don’t trust it to keep the exact temperature I want for possibly a month or more, I have it plugged in to my Inkbird temperature controller set to 140°F with the probe threaded through the lid’s vent hole, nestled inbetween the bags. Since this is in my basement, I’ve also had to wrap it in a thick blanket to help keep the temperature steady.
I’ll check on it daily and post an update in one week. At that point we’ll see if the koji rice is done and how the beans differ, if at all.
Day 2—2022-04-03
I wasnt going to update this until a week had passed, but check out the koji rice on day 2! You can also see that the amazake coffee beans have turned a bit yellow as well.
Here’s a closeup of the koji rice:
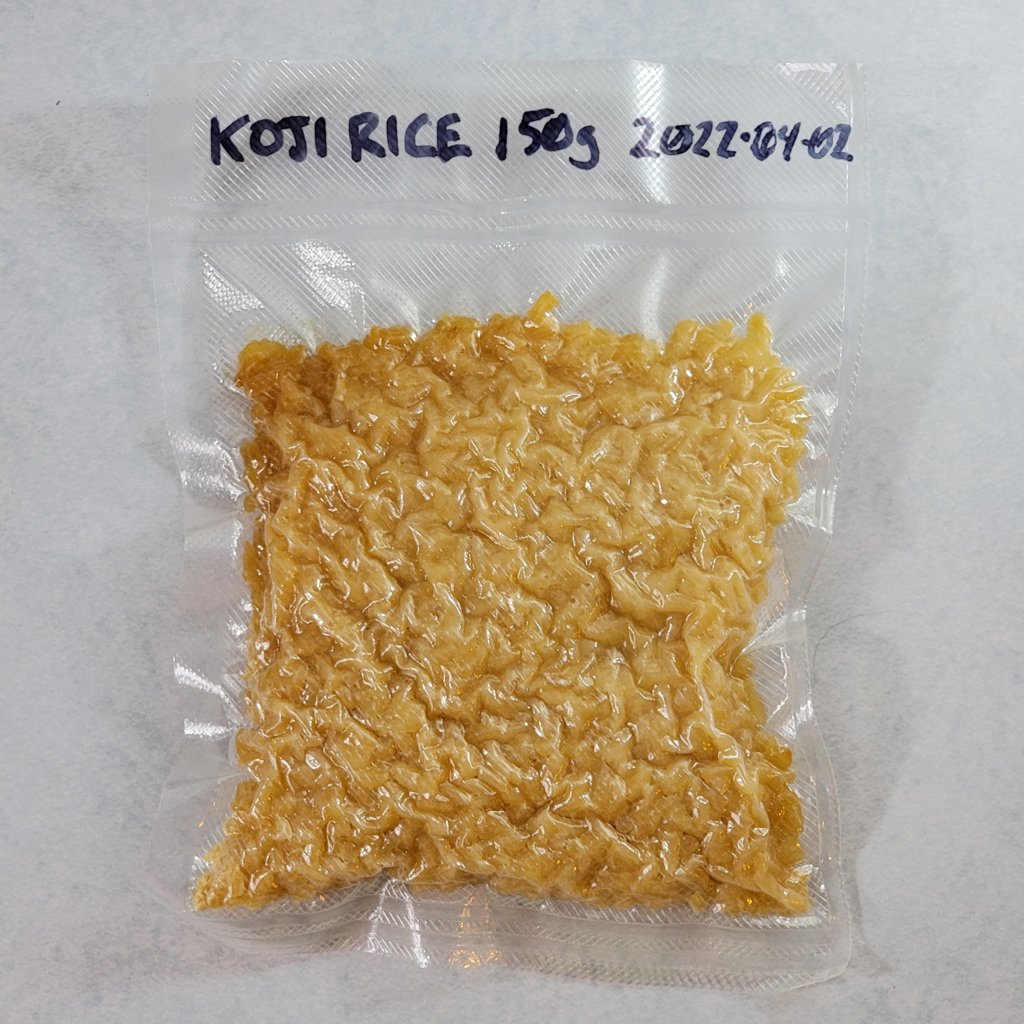
It’s darker on the underside, so I’m going to swap these around in the rice cooker occasionally so that I keep the heat as even as possible.
I’m also tossing in some toasted rice koji. Yes, it’s the same stuff from the Toasted Rice Koji Treats logbook a year ago! I’ve kept it in the freezer this whole time as I’m not quite sure what to do with it. I found it interesting that it’s about the same level of yellow-brown as the regular koji rice after 1 day, so they’re starting even.
Day 3—2022-04-04
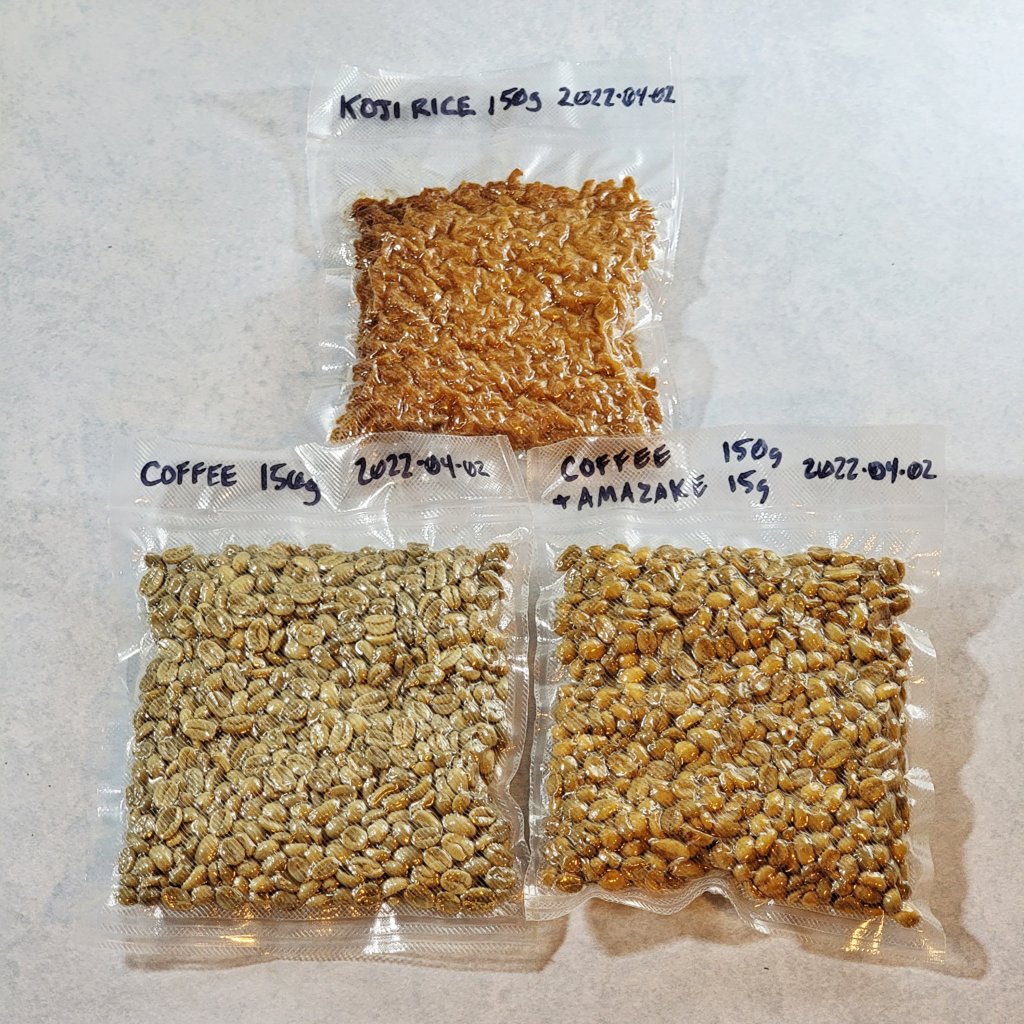
The koji rice is now in “brown” territory I’d say, whereas yesterday I still considered it “yellow”. I think the amazake beans are starting to pull ahead of the “control” as well.
I’ve also noticed that the temperature reading is often getting up to 142°F, so I think I insulated it a little too well. Hopefully that doesn’t completely ruin anything.
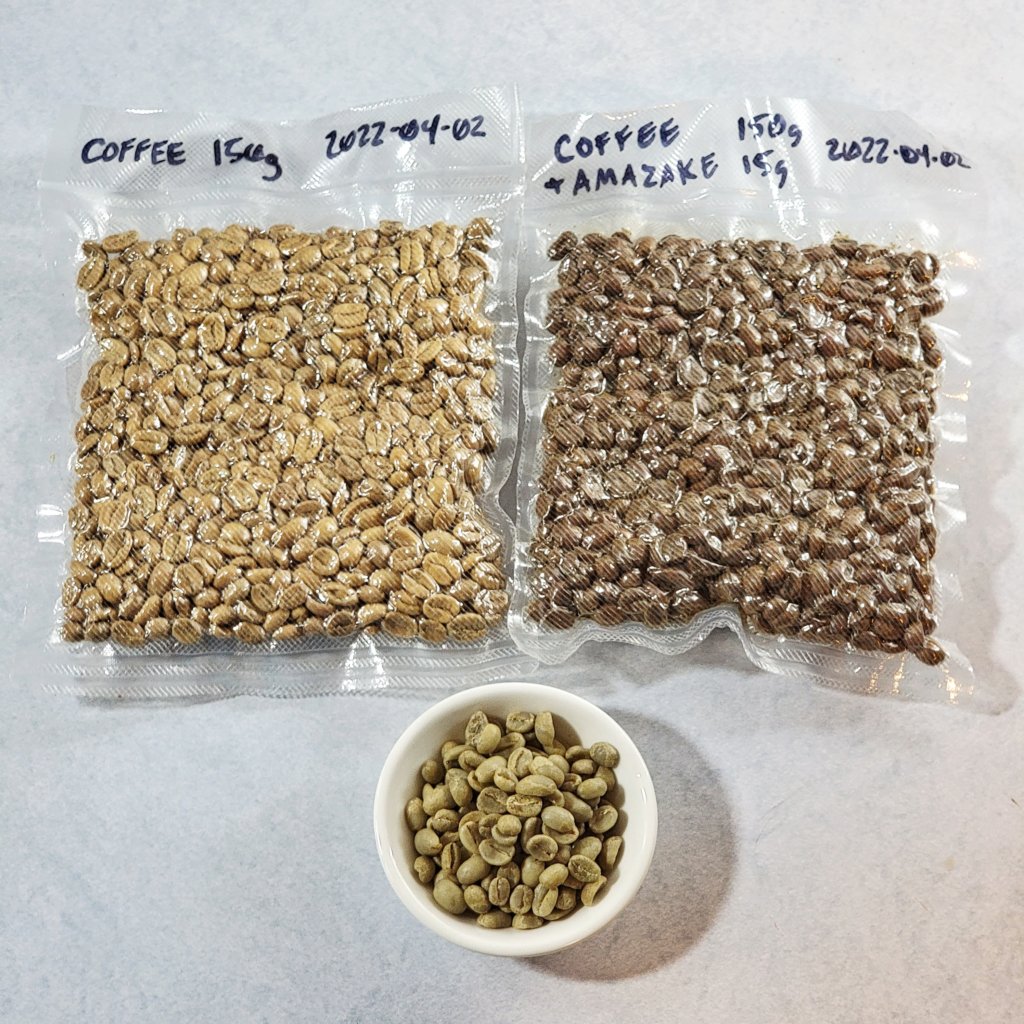
Day 5—2022-04-06
The koji has passed through yellowish completely into dark brown. The amazake beans are now distinctly more brown than the plain beans, pretty much at light roast stage.
I am almost tempted to pull the amazake beans out now. I wish I had done several bags so I could try them at different stages, but we’re going to stick with it.
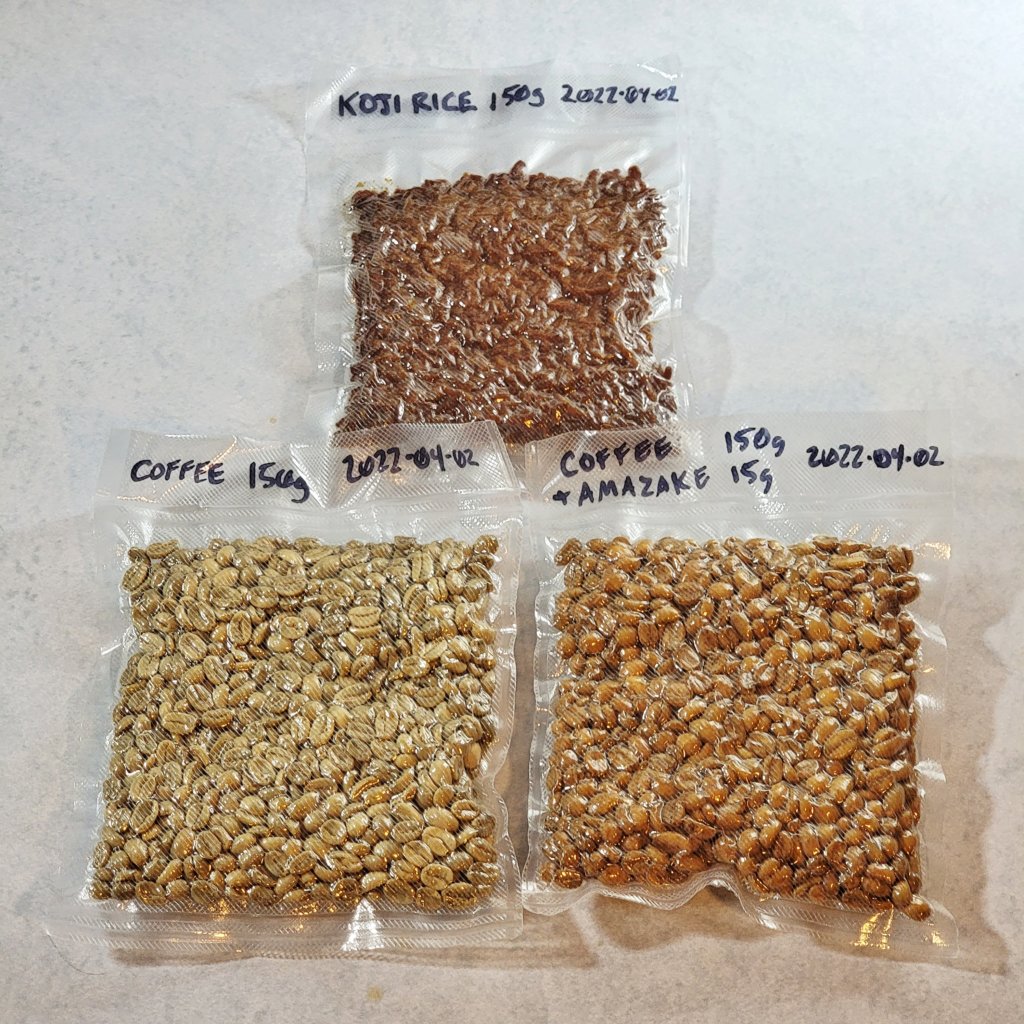
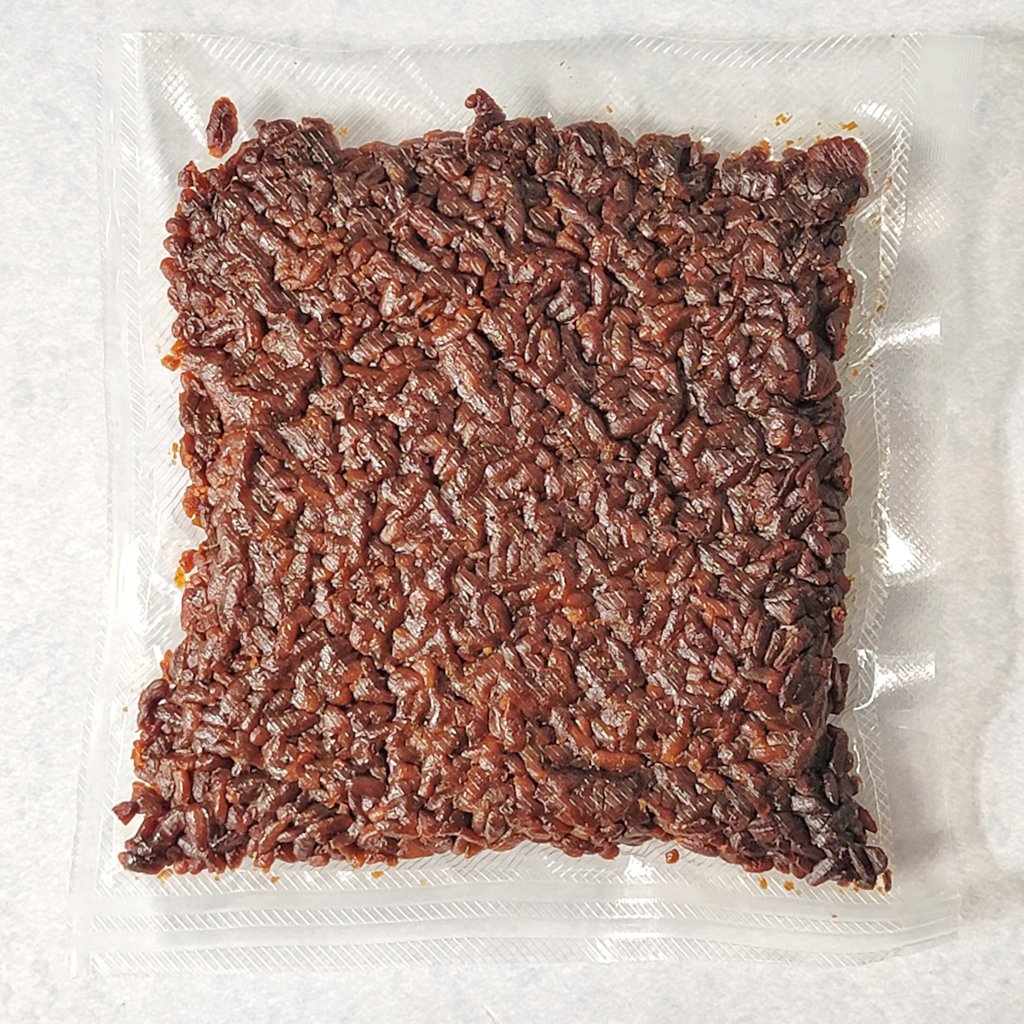
Day 7—2022-04-08
I’m calling it for the koji rice. This is fully blackened in roughly one week vs the 1–2 months it usually takes to blacken other things.
The amazake beans are really pulling ahead of the plain beans now, roughly medium roast color. I will let them all continue until fully blackened to find the various ranges we’re working with.
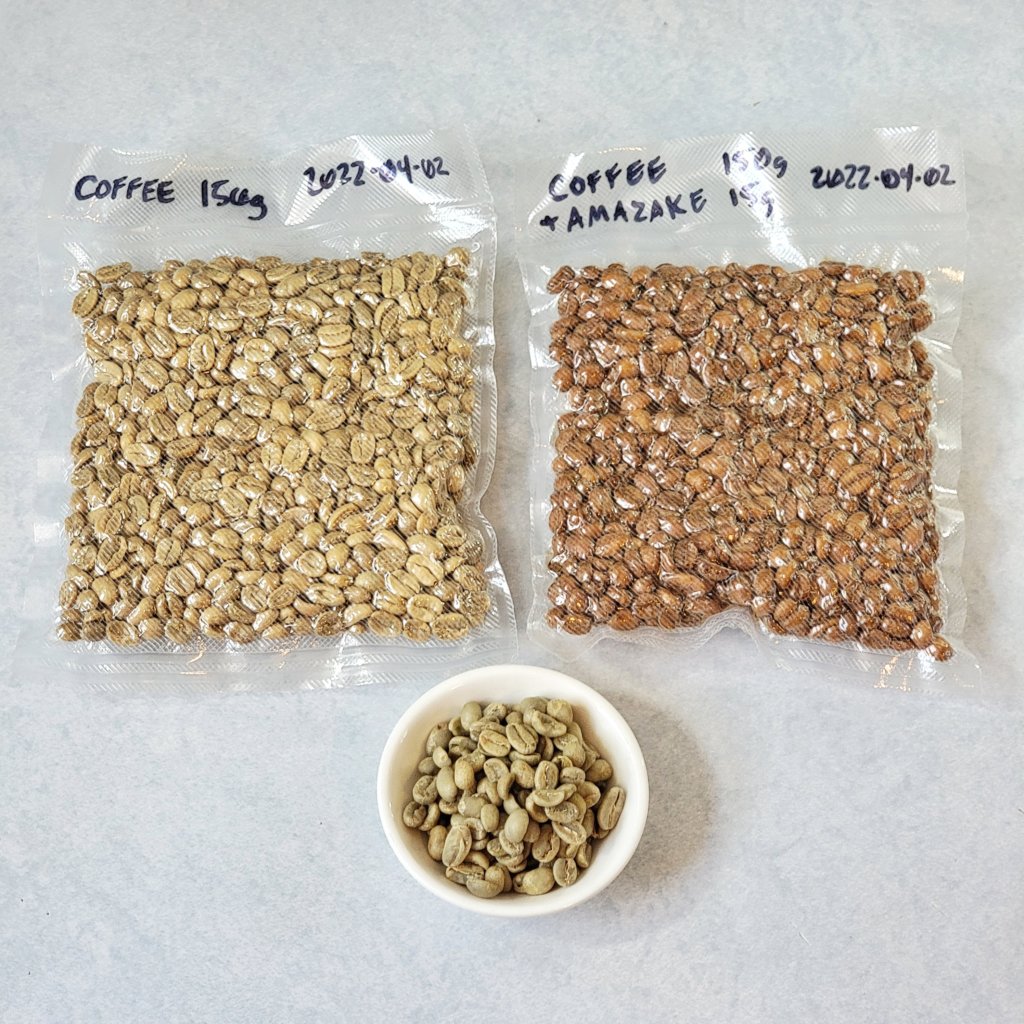
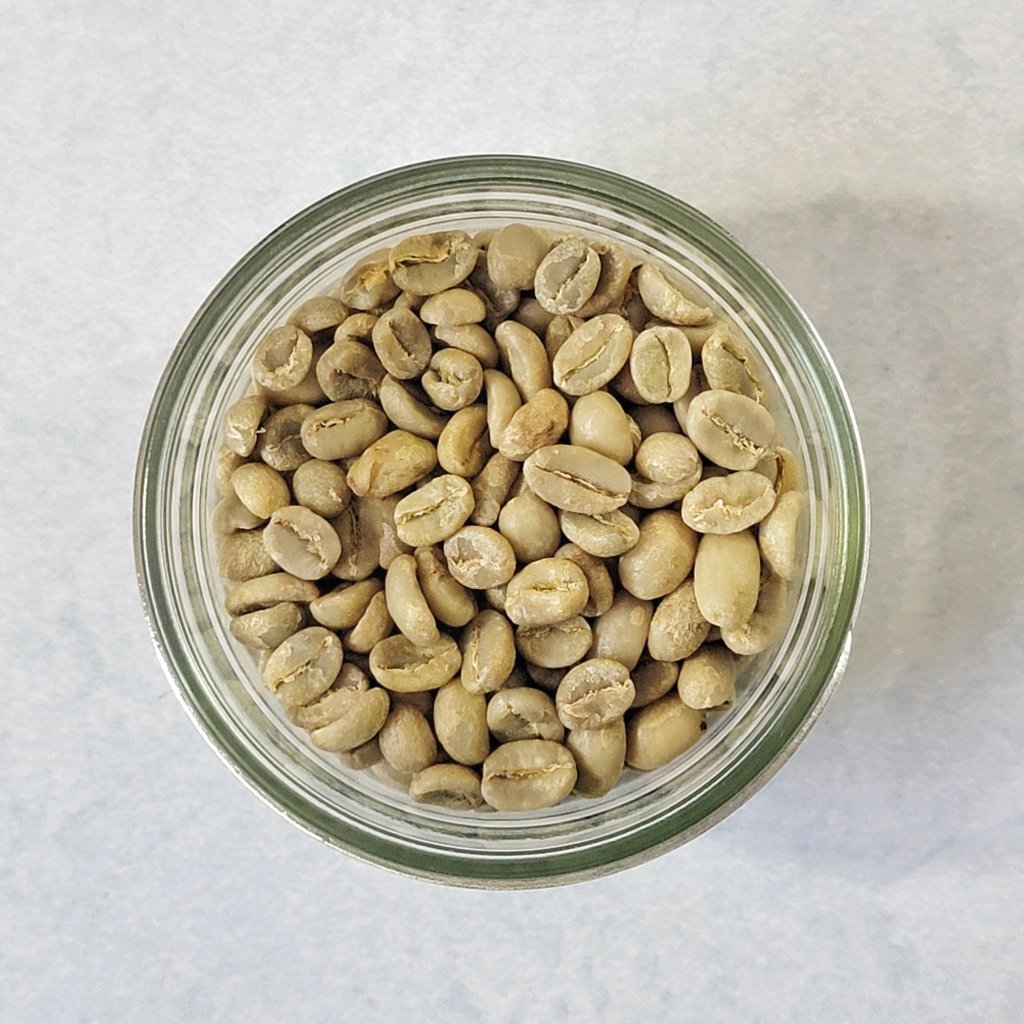
I wish I had thought of documenting this earlier, but here are the coffee beans next to the unroasted green beans after 9 days:
I’ve opened the blackened koji rice. It tastes surprisingly similar to blackened garlic, so I suppose most of the flavor I associate with blackened garlic comes from the deep caramelization of sugars. I pulverized it with a mortar and pestle to pack into a jar.
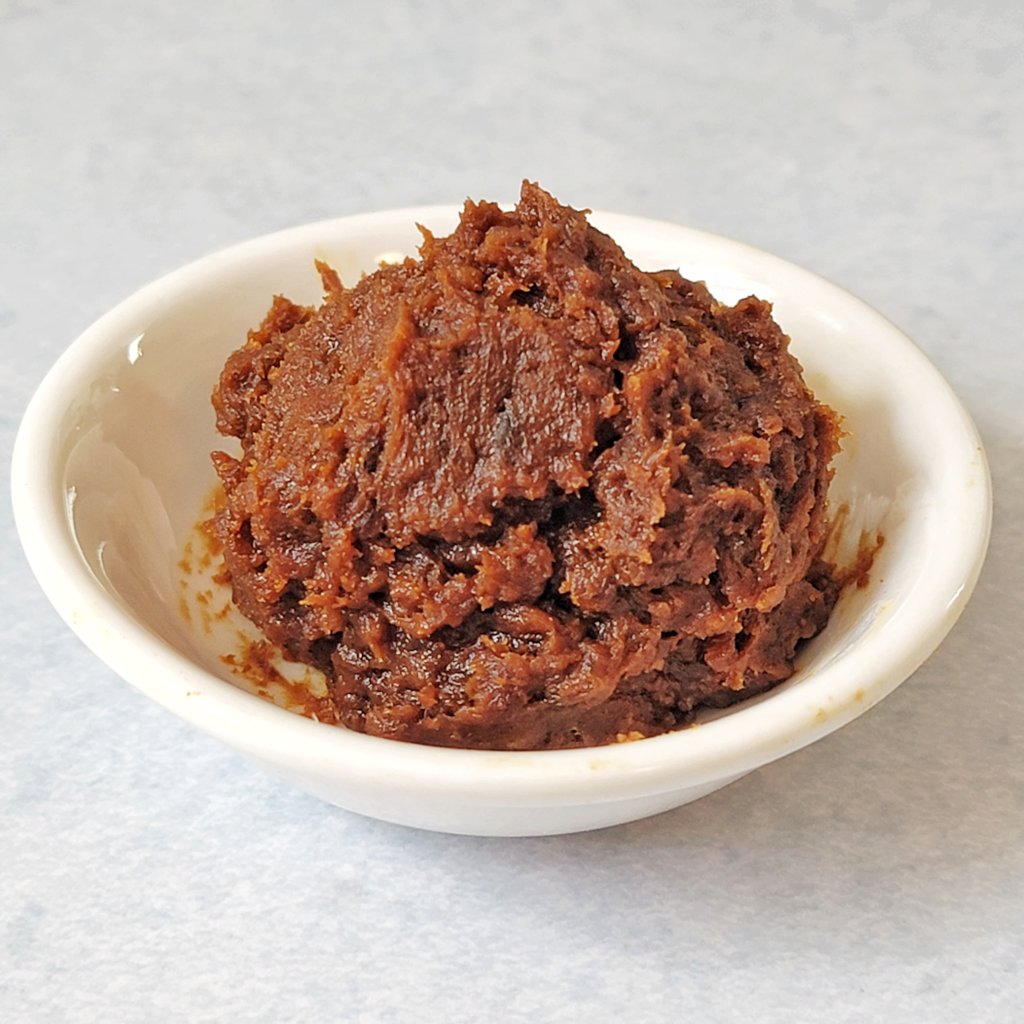
Blackened Koji Tasting Notes
- Aroma of earthy sweetness, like molasses
- Tastes of sweet umami caramel, almost malty
- Grains have kept their shape but easily give away into paste
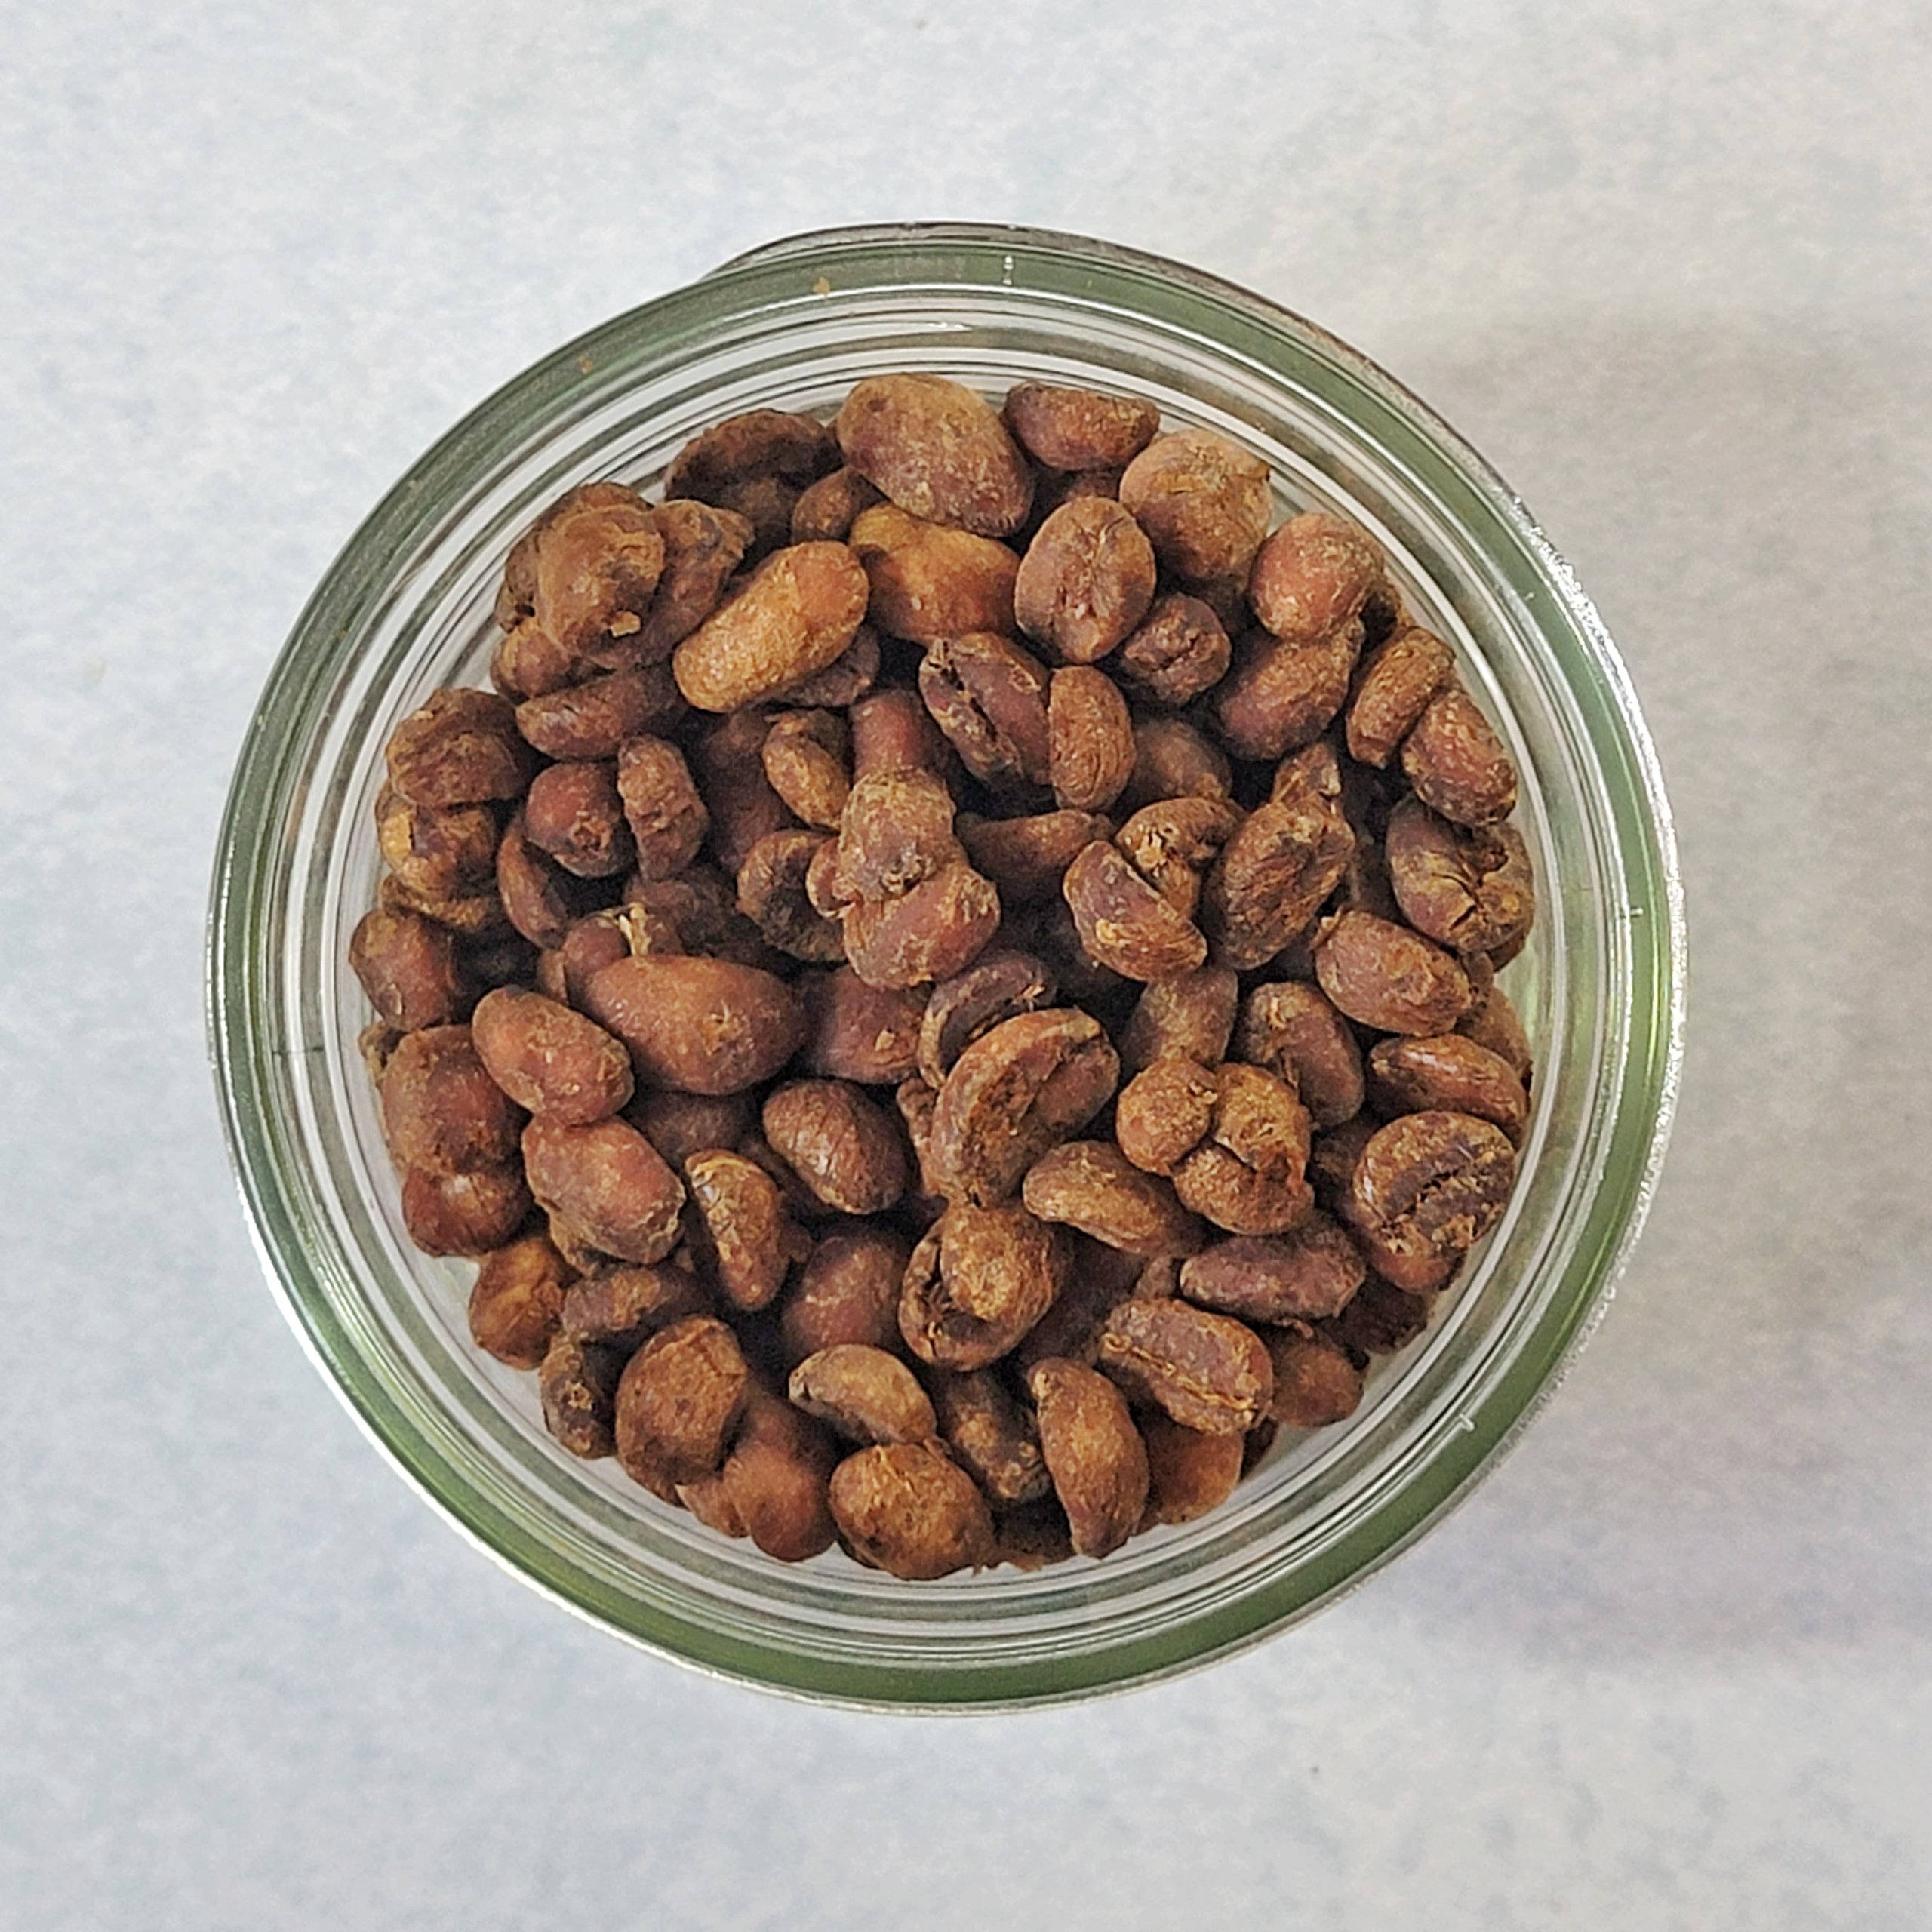
Day 23—2022-04-24
At 3 weeks, the amazake coffee beans are approaching dark-roast color. The regular green coffee beans look like the amazake beans at day 3. Even if the blackened coffee beans end up useless, this experiment with koji-enhanced blackening has been enlightening.
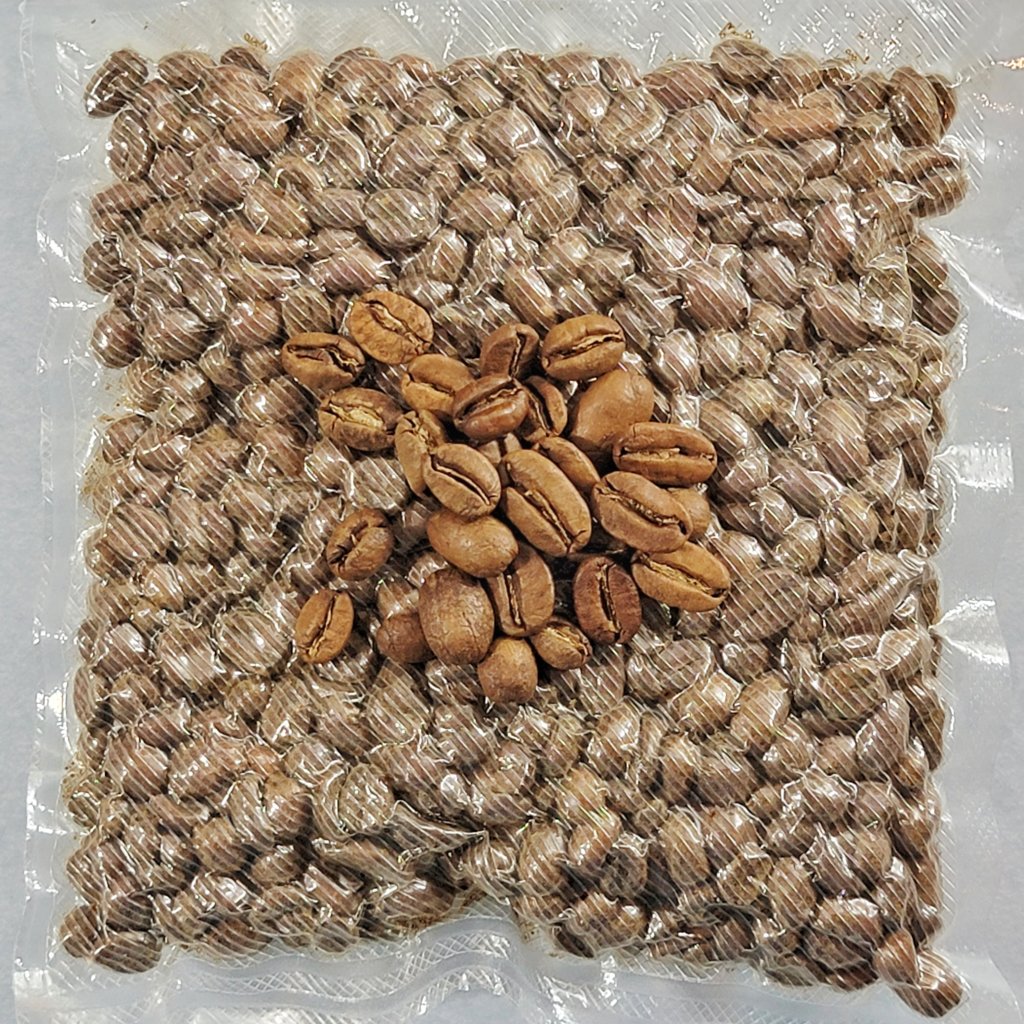
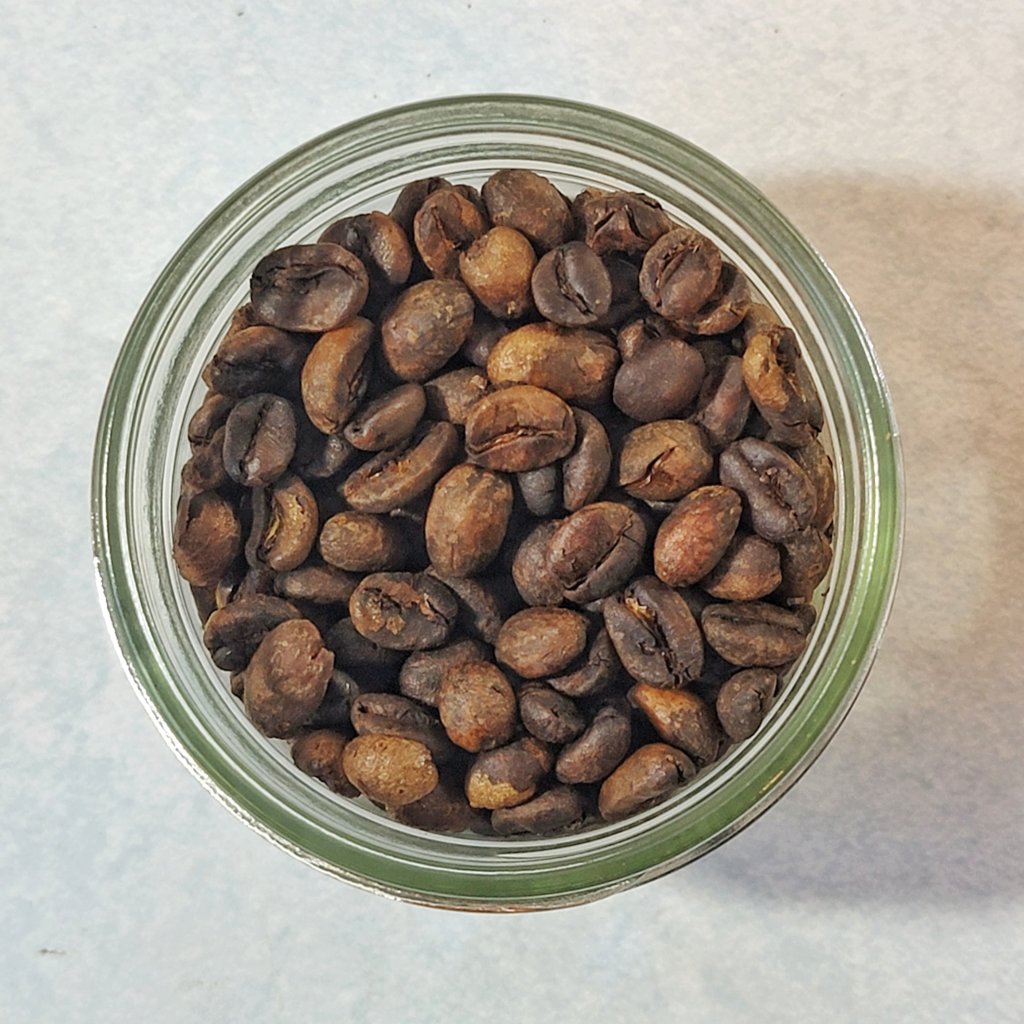
Day 30—2022-05-01
Definitely in dark roast land now. Here are some medium-roast beans on top for comparison:
It only occurred to me recently that I did not design a very good experiment here. I added amazake to one set of beans, but did not account for the fact that I’ve introduced extra moisture that the plain beans do not have. I should have done a third bag with some small amount of water, roughly 10g like I did with the amazake.
Feeling through the bag, it seems like the beans are holding up well. They don’t yeild much, if at all, when I squeeze with my fingers. There is no discernable difference in hardness from the regular beans.
I’m considering calling the amazake beans “done”. It seems like it might still be possible to grind and brew these, but I won’t know until I open the bag. The regular green coffee beans seem like they still have a very long ways to go, though they don’t look at all green anymore. Maybe I’ll open those up as well and see if they’ll brew? I realize that there is supposed to be a degassing step as well… but these need to be tasted!
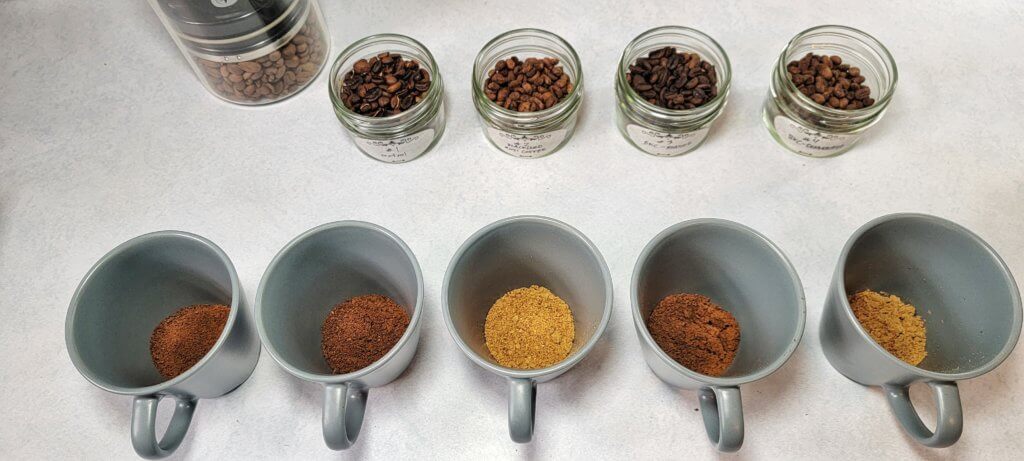
Finishing the Blackened Koji Coffee
In order to get the most out of this little 150g bag of blackened amazake coffee beans, I’ve split it into 3 50g batches to test different approaches to “finishing”.
Batch #1: Control
This batch is not the blackened coffee, but regular green coffee as a control. Well, I say control, but maybe I should say… practice? I have never roasted my own coffee before, so, wish me luck.
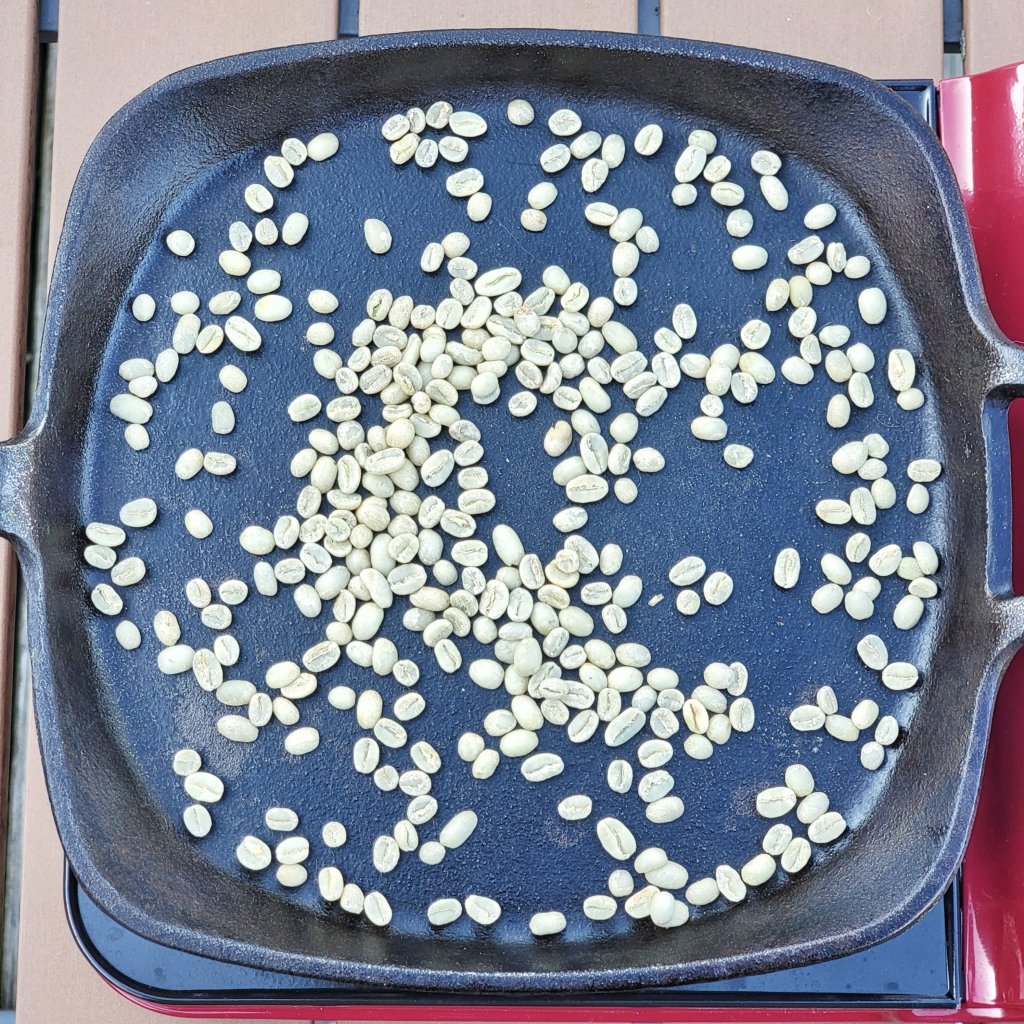
I’ve set myself up outside with a portable burner and a cast iron skillet. I wish I had a skillet this size with higher walls because I lost a few beans to the Great Outdoors, but overall it worked ok. I started a little too hot I think and had some uneven roasting as a result. Took about 7 minutes total.
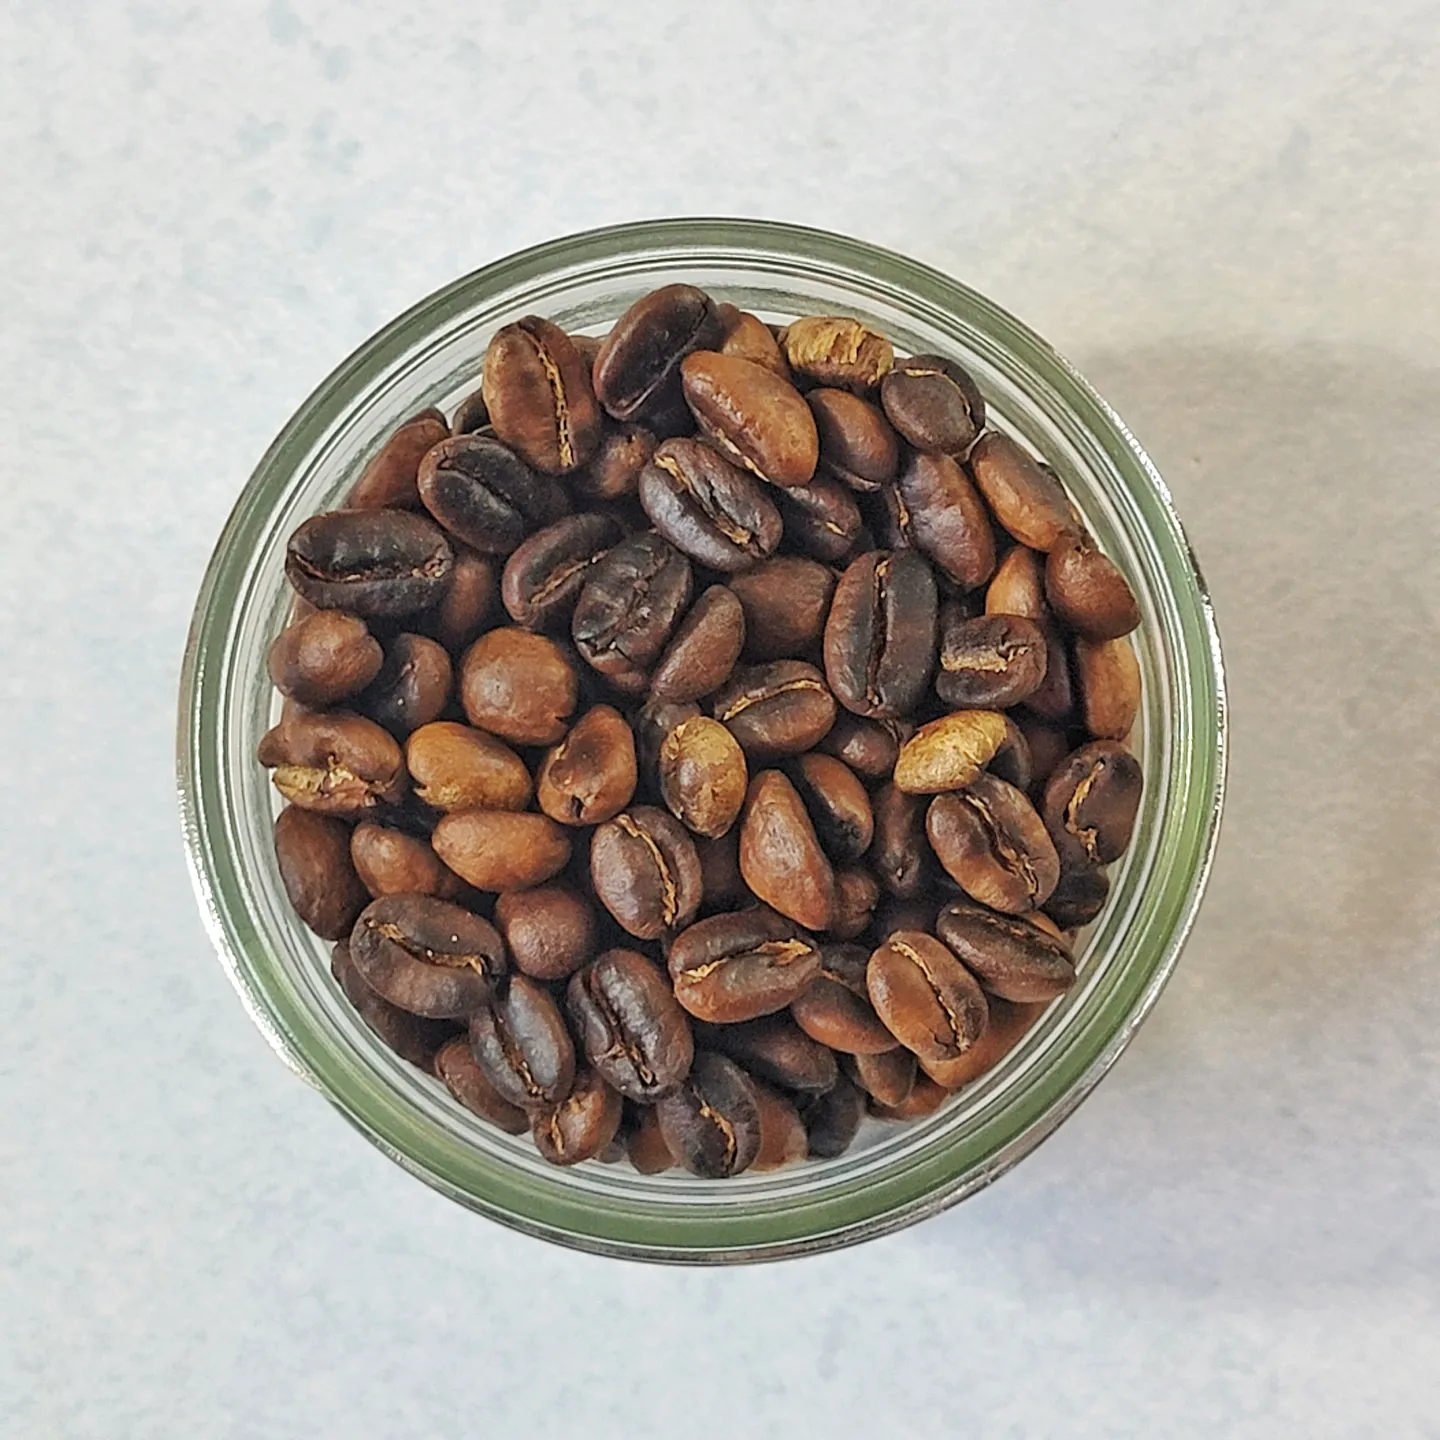
This and all other 50g batches are going into a small 4oz mason jar with the lid on loose for the first 24 hours. I’ll then tighten the lid and release any pressure build up like burping a ferment.
Batch #2: Blackened Koji Coffee
This batch is the other control. I’m just putting the blackened koji coffee into a jar until the others are ready to brew.
This means I’ve finally opened the vacuum bag after 30 days, and the aroma is heavenly! It’s an intensely dark chocolate scent, I almost want to just eat it but I don’t think that’s wise considering how hard these are.
I am hoping that they might be grindable, but just in case:
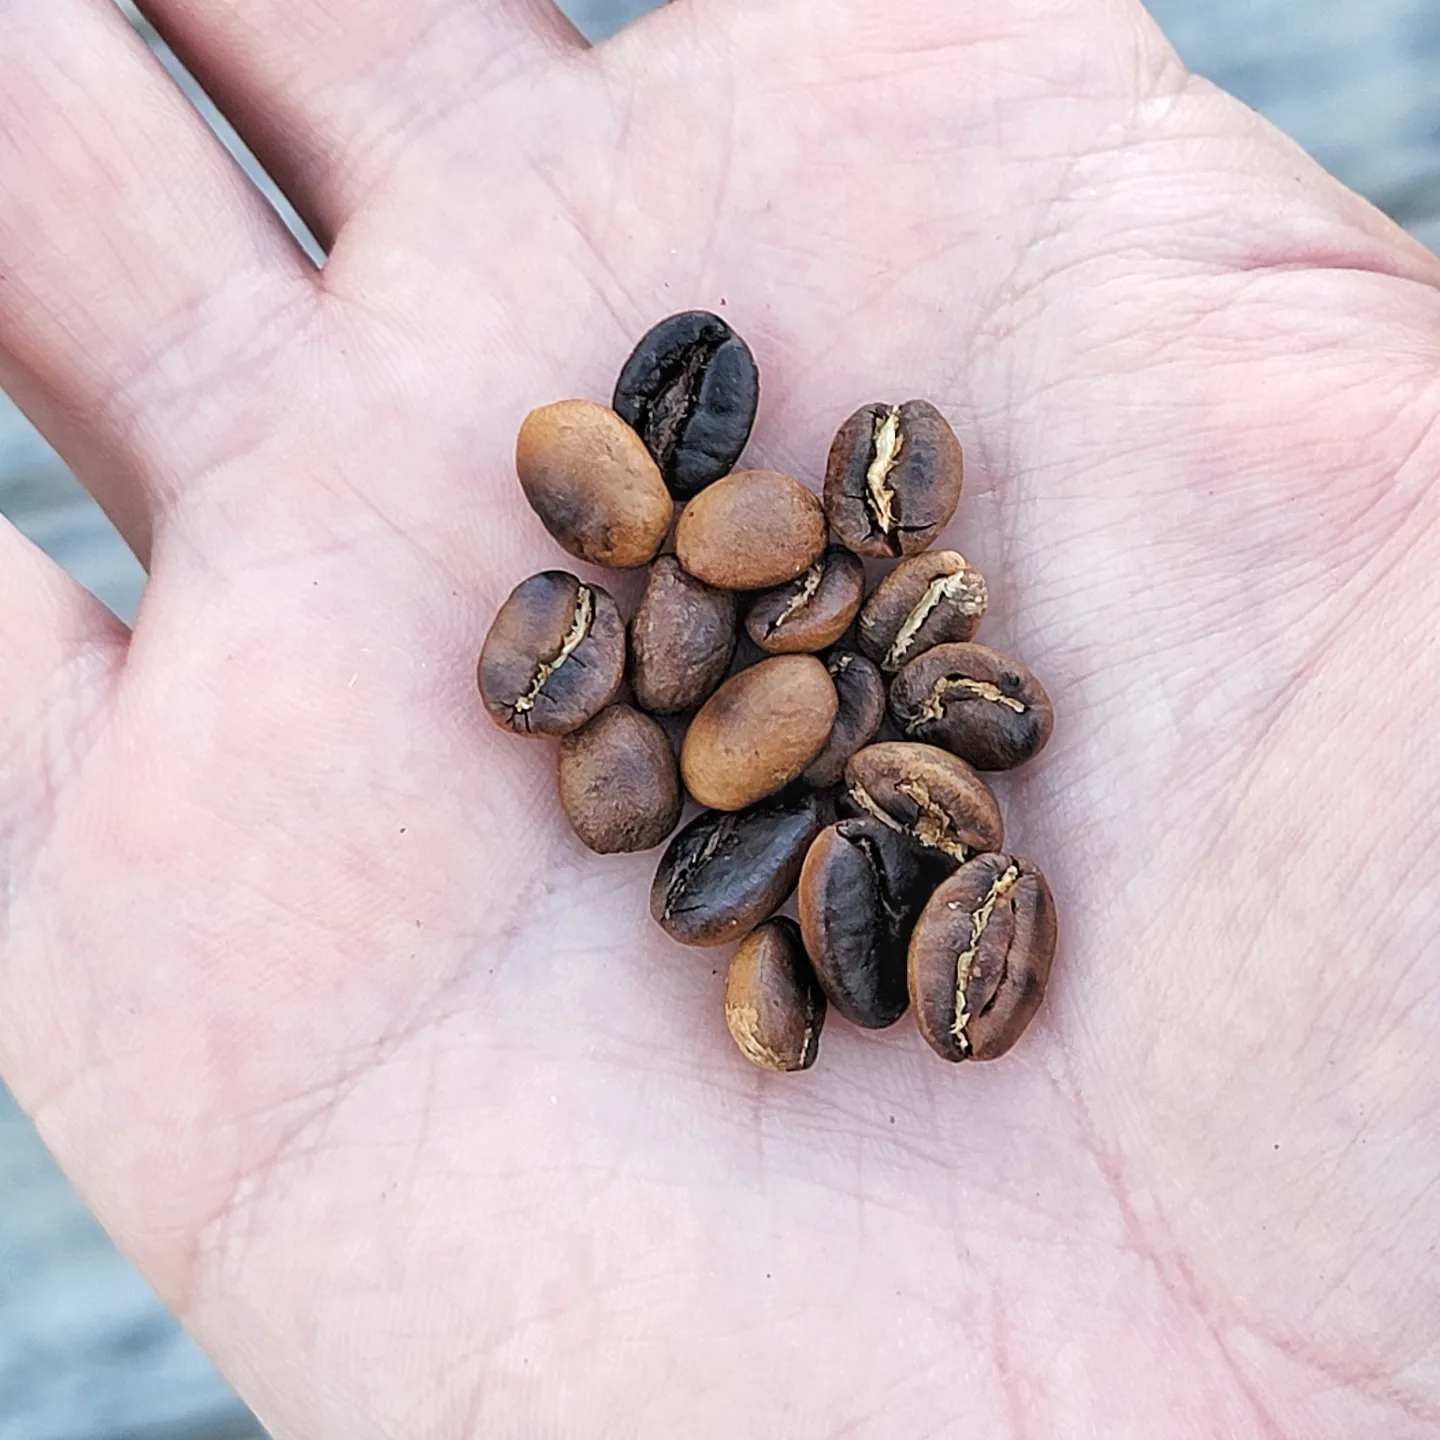
Batch #3: BKC Roasted
I was hesitant to even try to roast these at all since I suspected they would burn very easily, but I was convinced by some folks on the Crock of Time Discord to give it a go. I’m glad I did!
I was going to limit this roast to 5 minutes in case the beans did not “crack” like standard roasting, but they did actually start popping at around the 3 minute mark. I stopped at roughly 4 minutes to prevent them from burning.
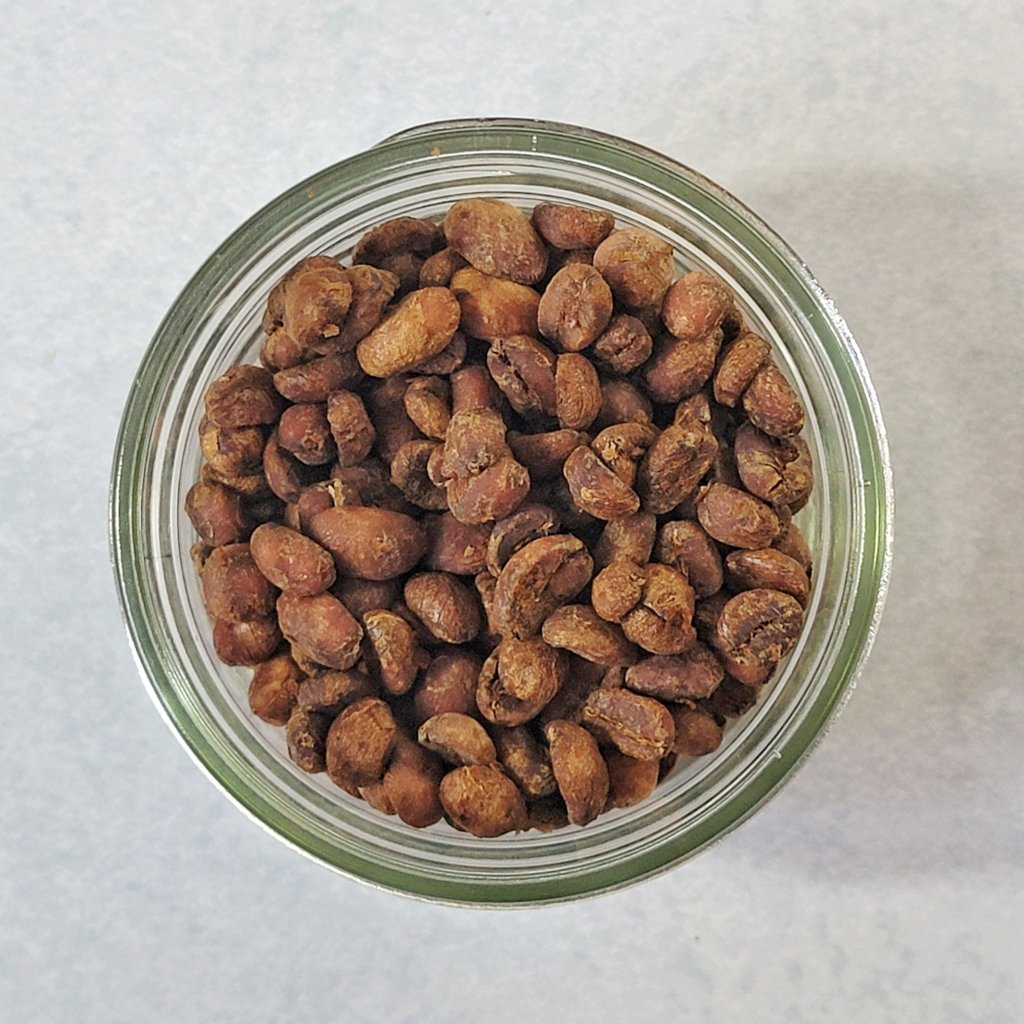
Batch #4: BKC Dehydrated
Originally I was not going to try to roast these since they are already browned, and so I thought perhaps a night in the dehydrator would at least help them lose some moisture for easier grinding. Now I’m wondering if this is really a good idea, considering coffee generally tastes stale after prolonged exposure to oxygen, but what have I got to lose?
I’ve set the dehydrator to 140°F/60°C and will check the weight tomorrow. I’m looking for roughly 15% weight reduction as suggested once again by Discord folks.
Day 2: Very little weight change. Ramping up to 160°F.
Day 4: Weight change of -5%, I think we’re not going to get much more out of this.
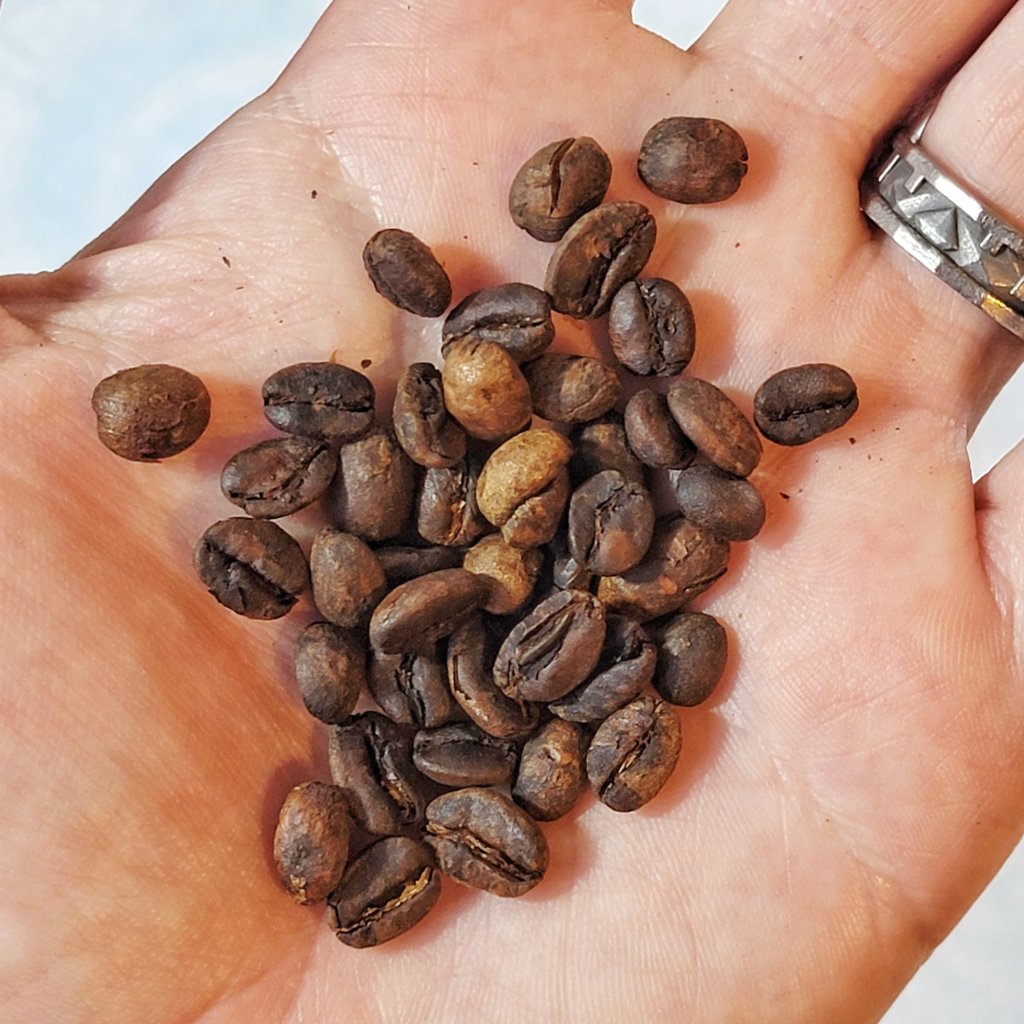
Tasting Blackened Koji Coffee
Its finally time for what you’ve all been waiting for. Tasting this koji coffee experiment!
I’ll be roughly following James Hoffmann’s coffee cupping guide, with one major difference: grinding the coffee. First, my grinder certainly doesn’t grind completely clean, some grounds are left in the grinder that will affect the next grind. Second, I’m afraid of damaging my grinder with these unroasted beans. Therefore, I’ll be using my spice grinder on all of the batches, attempting to get as even as possible but likely on the fine side.
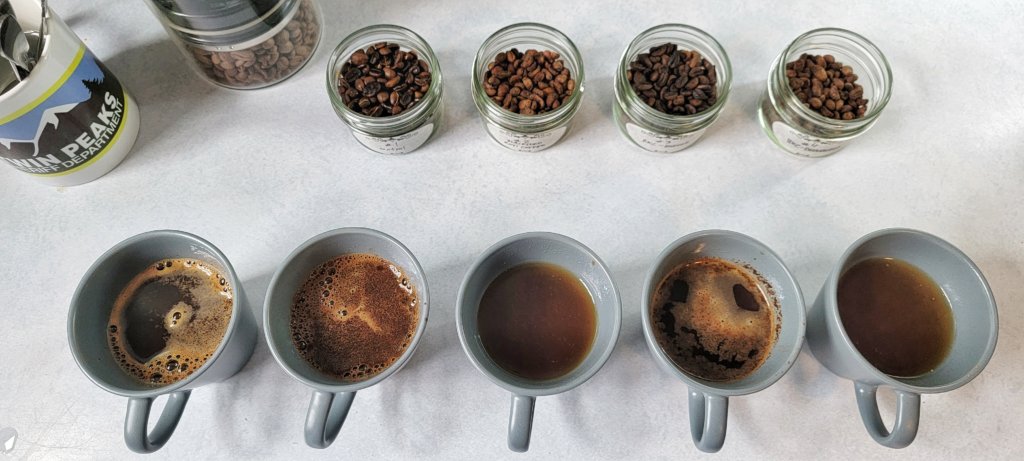
I also included Koji Supernatural in the tasting so that I could experience the humbling difference between my pan-roasted beans and beans roasted professionally, which also happen to include koji in the process.
The unroasted koji-blackened grounds sunk almost immediately with no crema, and the color is very light. The roasted version looked right and was even slightly darker in color than the regular (not blackened) roasted beans.
Tasting notes:
Batch #1: Control
- both burnt and acidic
- papery, woody
- leather
Batch #2: Koji-blackened, unroasted
- tea-like, weaker (low extraction)
- grassy, matcha
- sweet, floral, dandelion
Batch #3: Koji-blackened, roasted
- well-rounded roast
- sweet, floral, hibiscus
- malty
Batch #4: Koji-blackened, dehydrated
- similar to #2, but aftertaste lingers
- stale, but probably not as bad as if they had been roasted
Conclusions…?
Well, the clear winner was the roasted koji-blackened beans (batch #3), but what you really want to know is: is it worth it, right? I’m not sure I can really answer that yet. Tomorrow morning I will do a full pour over and consider if I would go through all of this trouble again. My suspicion is that I probably won’t.
Maybe if you are a dedicated home-roaster already, own dedicated roasting equipment, and buy green beans on the regular, then perhaps you might stick a larger batch of beans into an incubator with some amazake and try it out. Maybe with the right handling it could be the Best Coffee Ever™.
The important things to note are that they still need to be roasted, the heat needs to be gentle, and that it will still achieve first crack after blackening. I didn’t take it much further than first crack and I liked the flavor at cupping, but I’m a complete amateur so maybe you could push it further.
For now, I will keep this logbook open as the regular beans are still in the incubator.
Pour over test
Well, I did a pour over and, unfortunately, the standard medium grind size I use was apparently not quite fine enough and the result was under-extracted. I suspect this is because the beans were not fully roasted, so I will probably try roasting again some day and take them to second crack. I may also grind a bit finer just in case.
3.5 Months Later
I’ve been running this poor little rice cooker for over three months now, and the change in color to the control beans is so minimal that I think I will call it a bust.
The beans by themselves either do not have enough of their own enzymes to blacken within a reasonable timeframe, or there was not enough moisture.
Regardless, this was a fun experiment and I hope you enjoyed reading through my haphazard approach and rickety conclusions. Have you had coffee treated in some way with koji? Let me know in the comments below or in the official Discord server!


I loved this post! My partner Megan Rose was telling me about you and showed me your site. I love at home fermentation and I am a coffee roaster (I currently use a Hottop brand roaster). I would love to collab someone with beans like this!
Glad you liked it and didn’t cringe too badly at my inept roasting! If I do another batch I may very well take you up on the offer to roast it. Have you checked out the Discord?